
How to Create Multiple Choice Grid in Google Forms
Fast navigation
Struggling to capture nuanced responses in your surveys or quizzes? The multiple-choice grid in Google Forms is your solution.
This versatile format, perfect for detailed feedback or complex questionnaires, transforms the way you collect data.
In this concise guide, we'll walk you through six simple steps to masterfully create a multiple-choice grid, enhancing your Google Forms experience.
Let's unlock the potential of grids together!
What is a multiple-choice grid?
A multiple-choice grid (matrix) lets you ask several related questions that all share the same answer choices. In Google Forms it displays **statements as rows** and **answer options as columns**, and the respondent picks **one option per row**.
Example
Rate parts of a store visit (rows: Checkout, Staff helpfulness, Cleanliness) on the same scale (columns: Poor, Fair, Good, Excellent). Each row gets exactly one selection.
Why use it
- Keeps forms short while gathering structured, comparable feedback.
- Produces tidy data in Sheets for quick charts and analysis.
- Great for customer surveys, course evaluations, feature ratings, policy acknowledgments, and quick true/false checks.
Note
If you want respondents to choose more than one option per row, use a Checkbox grid instead.
Steps:
- Navigate to Google Forms and Open the Editor
- Add a Multiple Choice Grid Question
- Set Up Your Rows and Columns
- Configure Your Settings
- Preview Your Multiple Choice Grid
- Explore Advanced Features and Integration (Optional)
Step 1: Navigate to Google Forms and Open the Editor
- First, Go to the Google Forms website.
- If you’re not already signed in, enter your Google account credentials.
- Click on the Blank option or choose a template to start a new form.

- Give your form a title and description. Your form will look like this without a title

For our article example, we are creating a Google Form with Multiple Choice Grid questions for a restaurant. This form will collect “Customer Feedback” from the restaurant customers.
Step 2: Add a Multiple Choice Grid Question
- By default, you’ll have a question on your Google Form

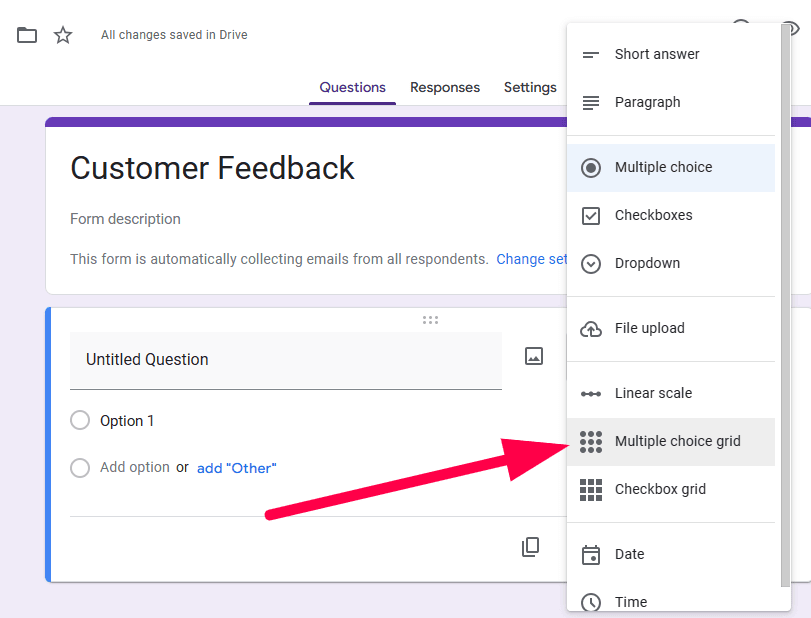
- Click on the drop-down arrow to open the dropdown menu.
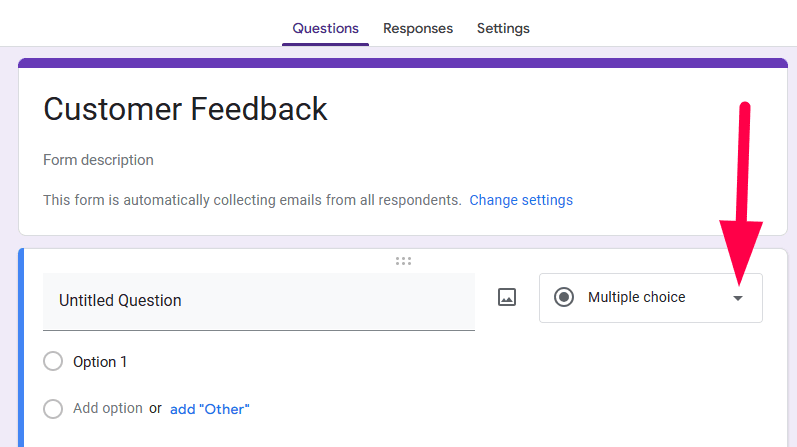
- From the drop-down menu, select “Multiple choice grid.”
- Enter your question in the provided field.

Continuing with our example from above, we will set the question for the customers of the restaurant: “How satisfied were you with the following aspects of your experience?”

Step 3: Set Up Your Rows and Columns
Enter the items for your rows and columns. Rows could be statements or questions, while columns are the options that respondents can choose from. Ensure that your rows and columns are clear and concise.

So the rows (basically statements or questions) will be like this (vertically) when the respondent fills up the form:

And the columns (basically choices/options/answers) will be like this (horizontally) when the respondent fills up the form:

Step 4: Configure Your Settings
- Decide if you want to make the question required, meaning the respondent cannot submit the form without answering.

Configure any additional settings as per your requirements. We discussed each setting briefly in Step 6 (don’t forget to check out that).

Step 5: Preview Your Multiple Choice Grid
- Click on the eye icon at the top of the screen to preview your form.
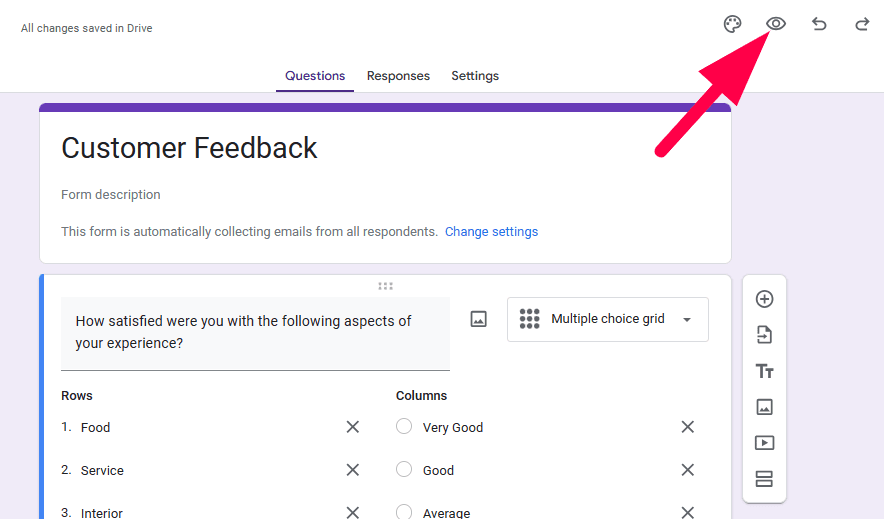
- Ensure that everything appears as it should and that the grid functions correctly.
Mine looks like this after all the above steps:

Step 6: Explore Advanced Features and Integration (Optional)
6.1: Integrate with Google Sheets To Analyse Responses
How to Do It: Once you have created your form, click on the “Responses” tab:

Then click on the green Google Sheet icon to create a new spreadsheet that will be linked to your form:

Impact: This integration allows for real-time data collection and analysis. You can view each response in a structured format, making it easier to identify trends, calculate averages, or perform other statistical analyses.
6.2: Shuffle Row Order
How to Do It: In the bottom right corner of your multiple-choice grid question, click on the three dots

Select “Shuffle row order”:

Impact: This randomizes the order of the rows for each respondent. This is particularly useful for quizzes or surveys where you want to minimize the order bias.
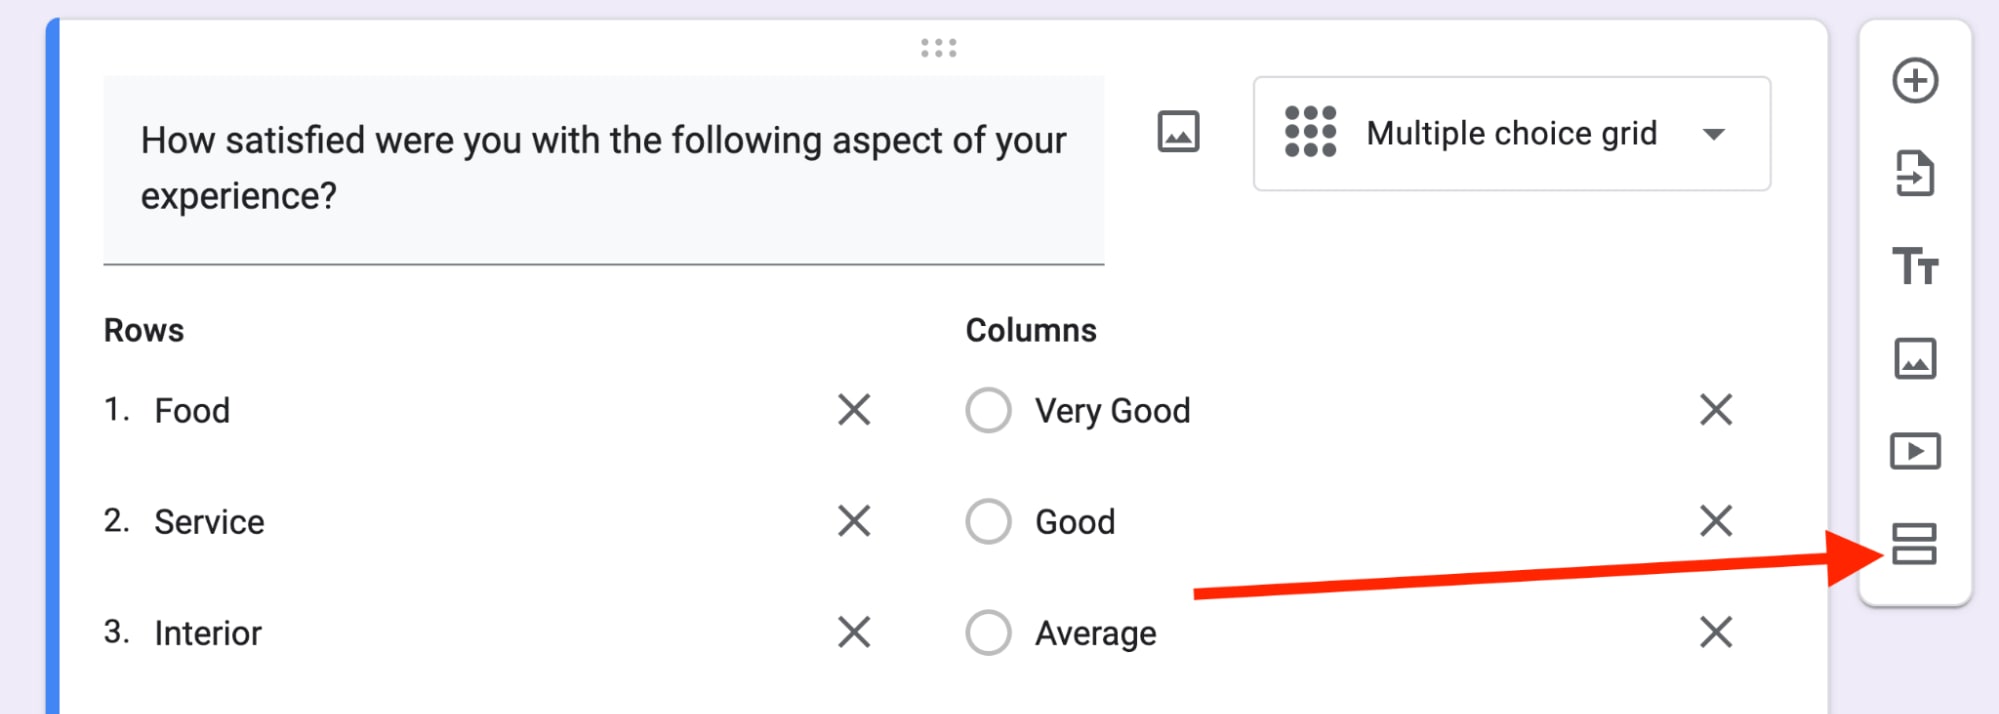
6.3: Add Section Headers and Descriptions
How to Do It: Use the "Add section" option from the sidebar to create different sections within your form. Each section can have its own header and description:
Impact: This helps in organizing the form, especially if it's lengthy. It guides the respondent through the form, making it more user-friendly.
6.4: Customize the Confirmation Message
How to Do It In the “Settings” tab, go to the “Presentation” section, And edit the confirmation message:

3 Template confirmation message for Google Forms
- Hooray! Your answers are zipping through cyberspace to us. Thanks for sharing your thoughts! Keep an eye out for what's next!
- You've sparked our curiosity! Thanks for completing our quiz. We're already diving into your answers. Stay tuned for more adventures!
- Your input is the seed of our growth. Thank you for taking the time to fill out our form. Watch out for how your ideas take root!
Impact: This allows you to provide a tailored message to respondents once they have submitted the form. Potentially directing them to additional resources, thanking them for their time, or providing the next steps.
6.5: Enable Quiz Mode
How to Do It: In the “Settings” tab, toggle the “Make this a quiz” button to turn the form into a quiz:

Impact: This is useful if you are using the multiple-choice grid for a quiz or assessment, as it allows you to assign point values to each option and provide automatic feedback to respondents.
FAQ
Q: What’s the difference between a multiple-choice grid and a multiple-choice checkbox?
A: Multiple-choice grids in Google Forms allow only one selection per row, ideal for single-answer questions. Checkbox grids enable multiple selections per row, fitting 'select all that apply' queries.
Q: How do I create a multiple linear scale in Google Forms?
A: To create a multiple linear scale in Google Forms, click the plus sign next to your question, and change the question type to 'Linear Scale' from the dropdown menu in the 'Multiple Choice' box.
Q: How do I format a checkbox grid in Google Forms?
A: Format a checkbox grid in Google Forms by selecting 'Checkbox' in the Fields tab. Customize by adding rows/columns, editing options, and changing labels using the drag-and-drop builder.
Q: How do I add an image to a multiple-choice grid in Google Forms?
A: To add an image to a multiple-choice grid in Google Forms, open your form, click on the desired question or answer, and then click 'Add image' on the right. You can then upload or choose an image and click 'Select' to finalize.