How to Make a Poll in Google Forms (6 Steps)
Fast navigation
In 6 simple steps, this guide will show you how to make a poll in Google Forms. Google Form doesn’t have a template for polling. You have to start from scratch. So let’s dive in!
Steps:
- Open Google Forms
- Name Your Poll and Add a Description
- Add Your Poll Questions
- Customize Your Poll’s Appearance
- Configure Your Poll Settings
- Preview, Share, and Collect Responses
Step 1: Open Google Forms
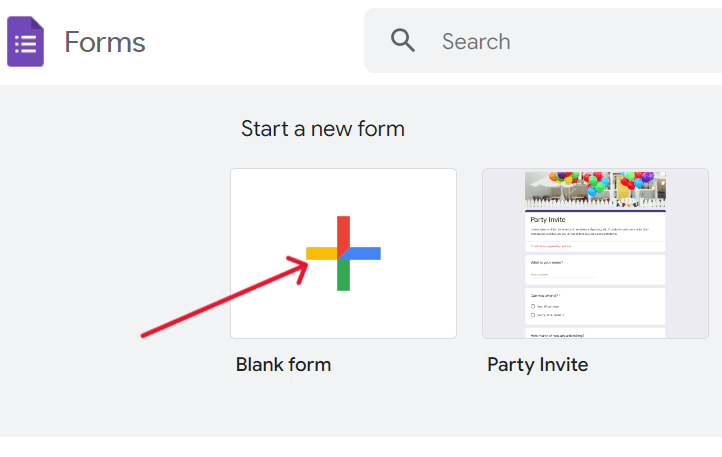
To kick things off, navigate to Google Forms and sign in if you haven't already. Select the ‘Blank’ template to start with a fresh form.
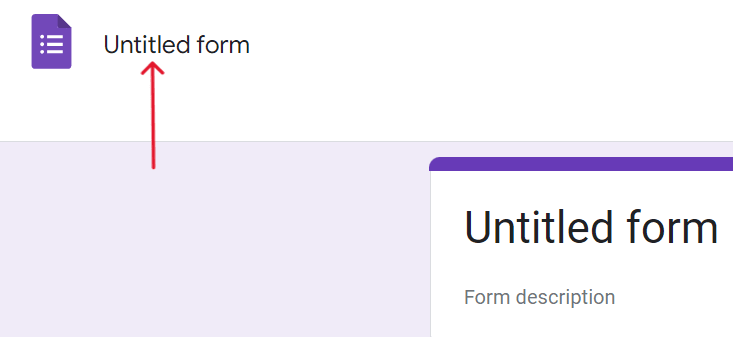
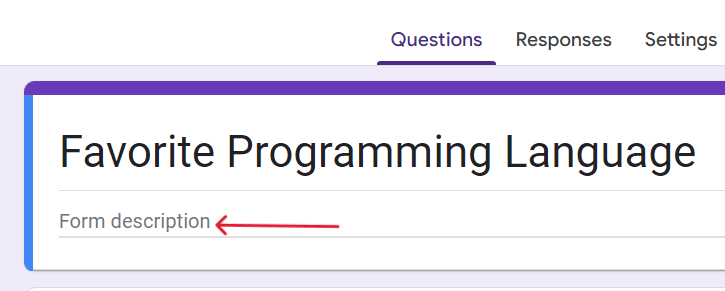
Step 2: Name Your Poll and Add a Description
Step 3: Add Your Poll Questions
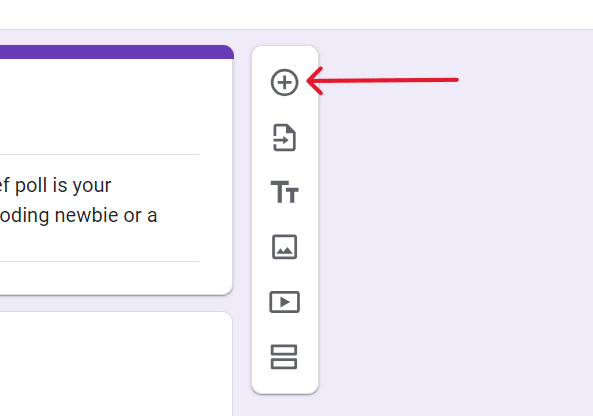
Click on the “+” button on the right to add your first question.
Type your question in the question field.
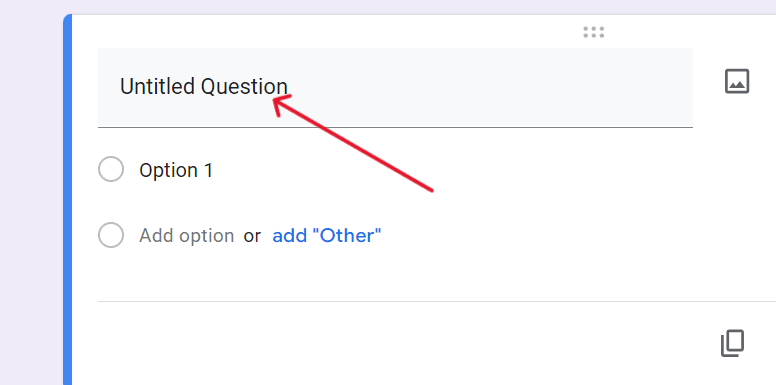
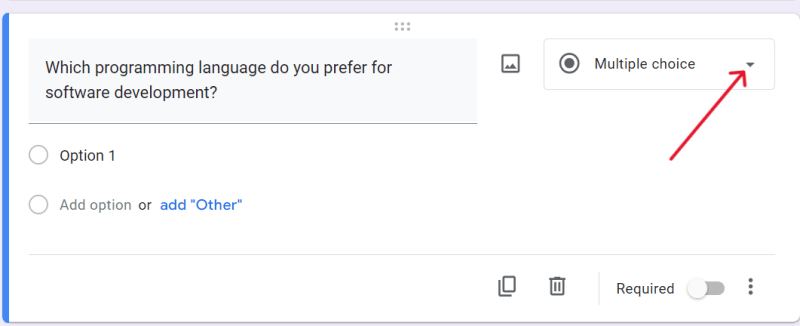
To select the type of question, click on the drop down arrow on the right of the question.
Start with “Multiple choice” for a basic poll option.
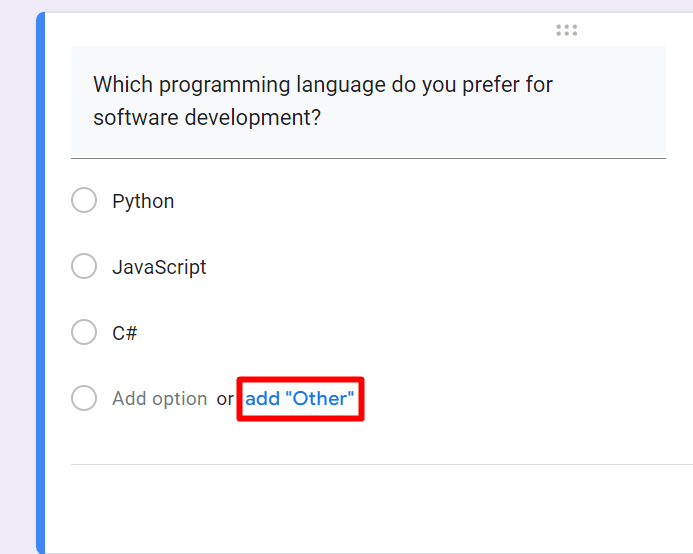
Enter the response options for your poll question.

If you are okay with allowing the participant to add their custom answer, click on the “Add Other” option to allow it.
Finished!
3 Advanced Question Types for Nuanced Feedback (Optional)
In Google Forms, you have the flexibility to go beyond simple multiple-choice questions. Here’s how you can use advanced question types to make your poll more insightful:
1. Linear Scale
Linear Scale allows respondents to rate a statement or question on a predefined scale. It's perfect for gauging intensity or frequency, providing a clear picture of how your audience feels about a particular topic.
How to Set Up: Select "Linear Scale" from the question type dropdown. Define the scale (for instance, 1 to 5) and optionally add labels for the lowest and highest values, such as "Least Favorite" and "Most Favorite" for a programming language preference question.
Example Use: "On a scale of 1 to 5, how comfortable are you using [Programming Language]?"
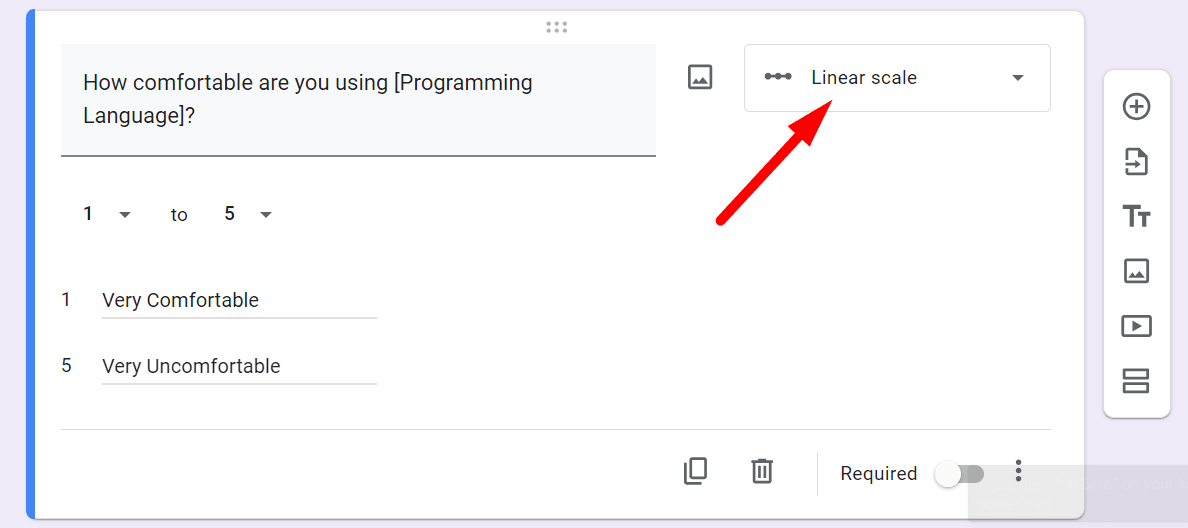
And this is how the question will look to the participant:

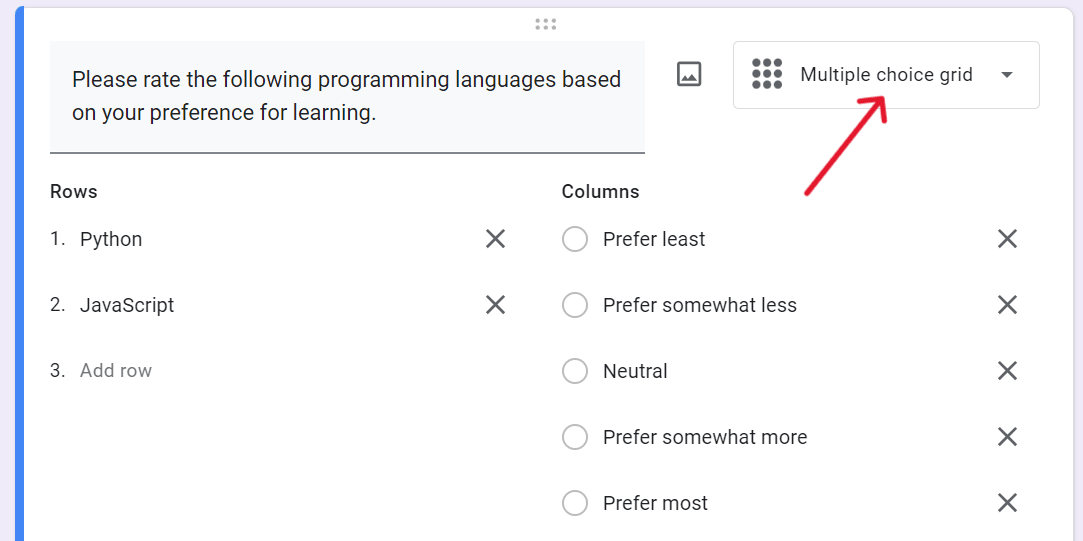
2. Multiple Choice Grid
Multiple Choice Grid lets you ask respondents to evaluate multiple items against the same set of criteria. It's useful for comparing several options side-by-side without creating a lengthy series of individual questions.
How to Set Up: Choose "Multiple choice grid" from the question type options. Enter your row labels (the items to be compared, such as different programming languages) and column labels (the criteria, such as ease of learning, efficiency, etc.).
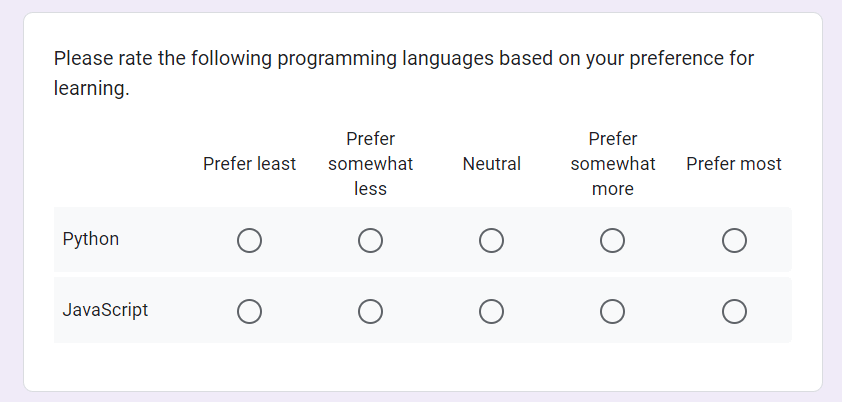
Example Use: "Please rate the following programming languages based on your preference for learning. (1 = Prefer least, 5 = Prefer most)"
And this is how the question will look to the participant:
3. Checkbox Grid
Checkbox Grid operates similarly to the Multiple Choice Grid but allows respondents to select multiple options per row. This type is beneficial when you want to know all the applicable choices for each criterion.
How to Set Up: Select "Checkbox grid" from the new question dropdown. Input your criteria as rows and the options as columns.
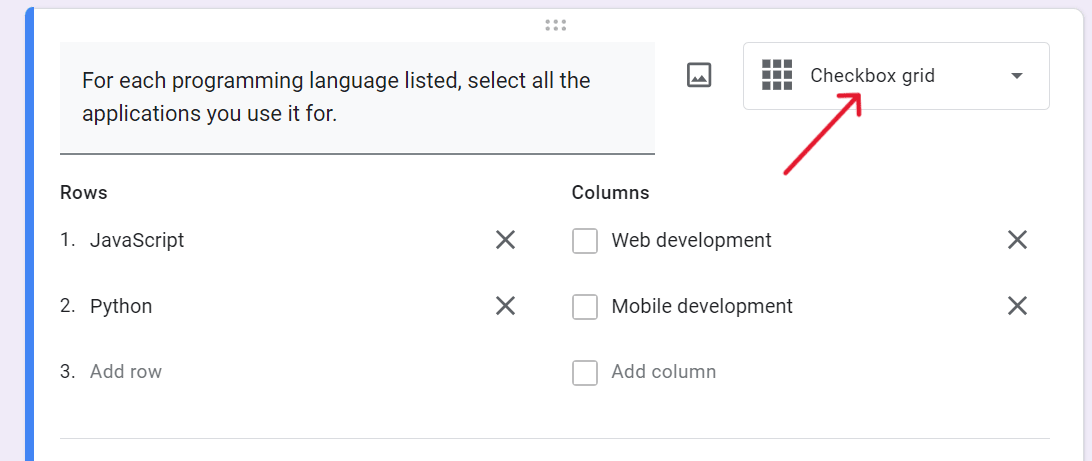
And this is how the question will look to the participant:

Step 4: Customize Your Poll’s Appearance
Honestly, Google Form doesn’t offer you much to customize. At the end of the day, it’s a free tool. Although let me show you the ones that most people customize for their polls appearance.
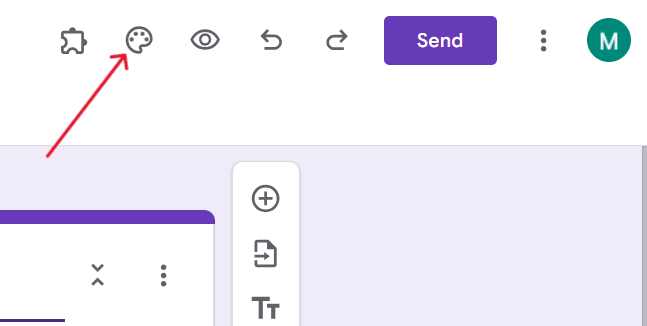
1. You can change the theme of the poll. Click on the palette icon in the top right to choose any theme options according to your poll.
2. Choose a color or upload a photo for the header image to match your brand or poll theme.

3. Select a font style that aligns with your aesthetic.

Step 5: Configure Your Poll Settings
There are not many settings that you can adjust for better response results. But let me show you what are the helpful ones which can become handy.
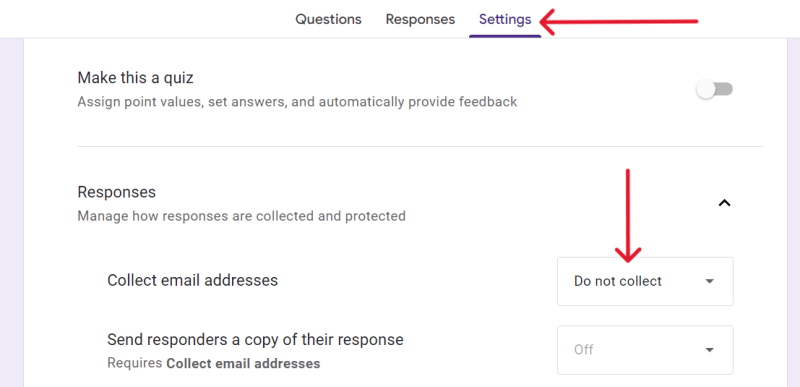
1. In the “Settings” tab, under “Responses”, set “Collect email addresses” to “Do not collect” for anonymous responses. This might encourage people to take part.
2. You can customize the confirmation message by switching to the “Presentation” tab.

Step 6: Preview, Share, and Collect Responses
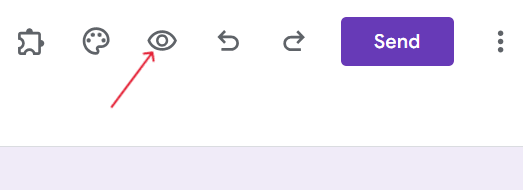
Click on the eye icon to preview your poll. Here you should QA the form that will appear in front of respondents. Make sure everything looks perfect!
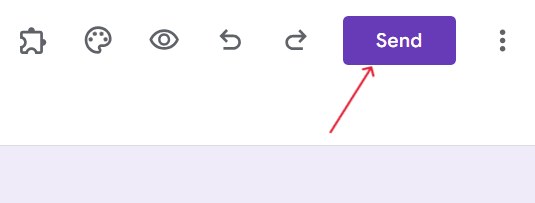
If everything is okay, share your poll by clicking ‘Send’ at the top.
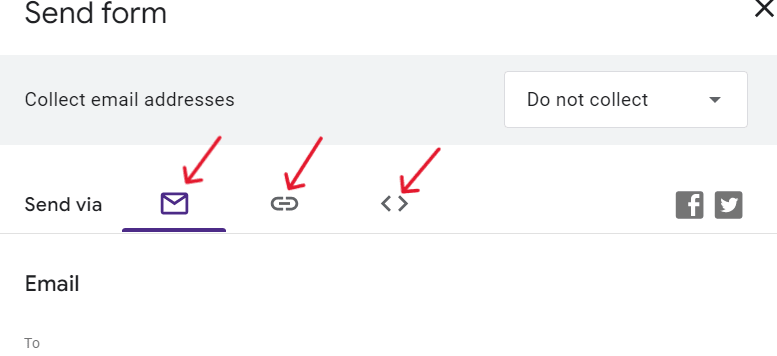
Choose between email, link sharing, or embedding form in your website. However you want to share.
And you have created a simple but nice looking poll in Google Form for your target audience.
Finished!
Analyze Poll Results for Insights
To analyze poll results for insights, view responses in the “Responses” tab, where Google Forms conveniently charts your data, giving you immediate visual insights into your poll results.
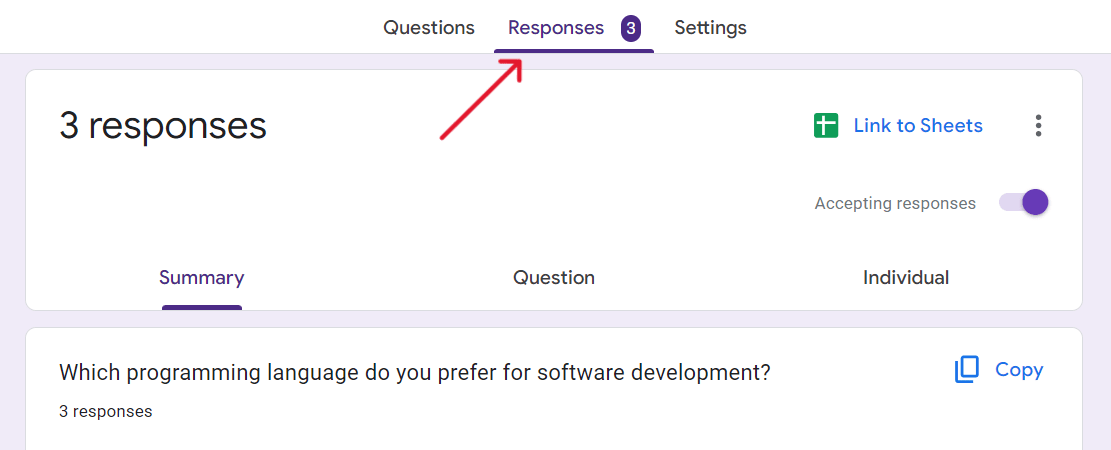
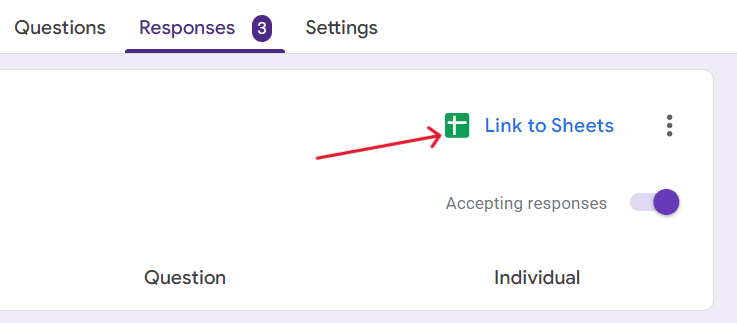
You can view the response data in Google Sheets also. On the “Responses” tab and you’ll see the “View in Sheets” option. It's a nice feature that Google Forms has.
Advanced Tips for Poll Success
A/B Testing: Create two versions of your poll with slight variations to compare results.
Custom Branding: Use your organization's colors and logo for a professional look.
Data Privacy: Assure participants of their privacy to encourage honesty.
Follow-up Actions: Consider sending thank-you emails or sharing results to engage your audience further.
By following these detailed steps and incorporating advanced features, you’ll create a poll that’s not only functional but also engaging and insightful. Dive into Google Forms with confidence and make your poll a valuable tool for gathering the feedback or insights you need.
