
How to Make a Sign up Sheet on Google Forms
Fast navigation
- Step 1: Create a New Blank Form//
- Step 2: Name the Form and Add a Description//
- Step 3: Insert Fields for Names and Email Addresses//
- Step 4: Incorporate a Dropdown for Time Slot Selection//
- Step 5: Apply Response Validation for Email Input//
- Step 6: Configure Your Form Settings//
- Step 7: Preview and Test the Form//
- Step 8: Distribute the Form//
- Step 9: Monitor Sign-Up Entries
How to Make a Sign up Sheet on Google Forms
In 9 simple steps, this guide will show you how to make a sign up sheet on Google Forms.
Managing event registrations, volunteer sign-ups, or any activity requiring participant information is easy with this method.
So let’s dive in and create your sign up sheet on Google Forms!
Steps:
1. Create a New Blank Form
2. Name the Form and Add a Description
3. Insert Fields for Names and Email Addresses
4. Incorporate a Dropdown for Time Slot Selection
5. Apply Response Validation for Email Input
6. Configure Your Form Settings
7. Preview and Test the Form
8. Distribute the Form
9. Monitor Sign-Up Entries
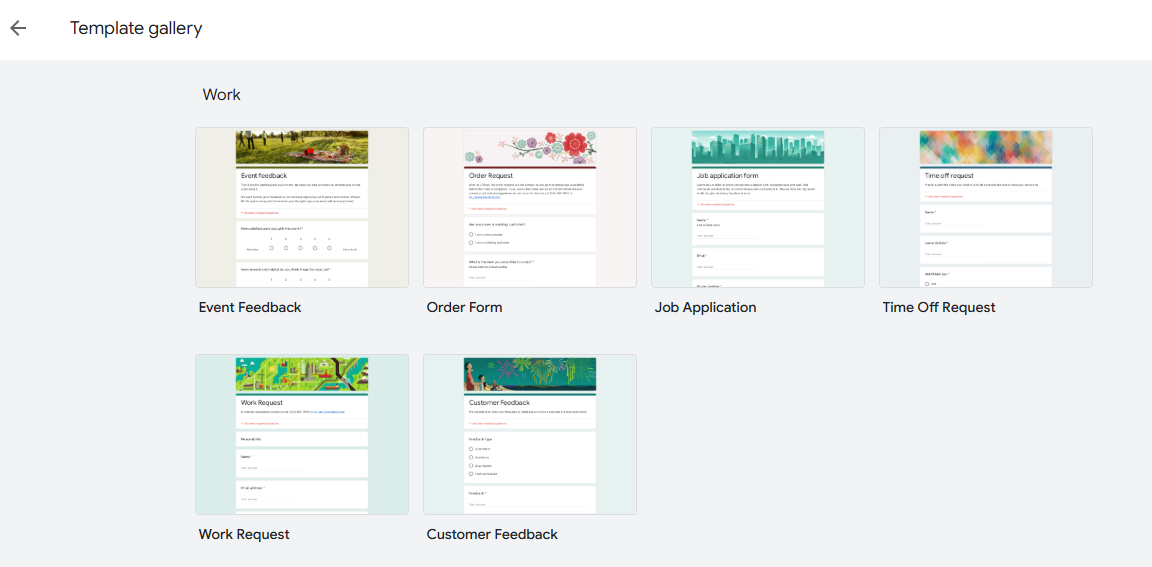
Step 1: Create a New Blank Form or Open an Existing Template
Open Google Forms. Click on the ‘+’ icon to create a fresh, untitled form.
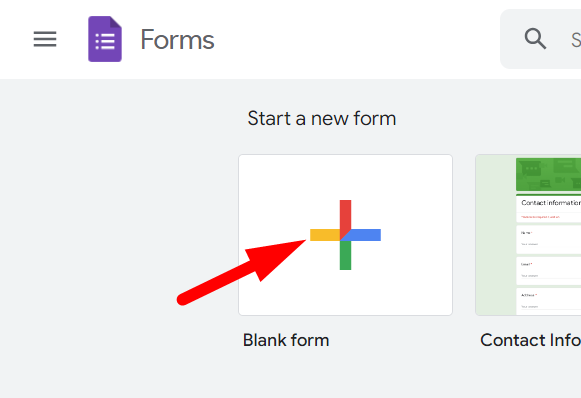
Otherwise, you can choose a template from the template gallery that aligns with your sign-up sheet.
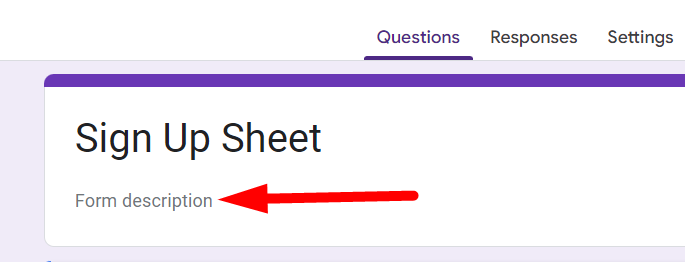
Step 2: Name the Form and Add a Description
Click on the "Untitled form" field at the top to enter a title.
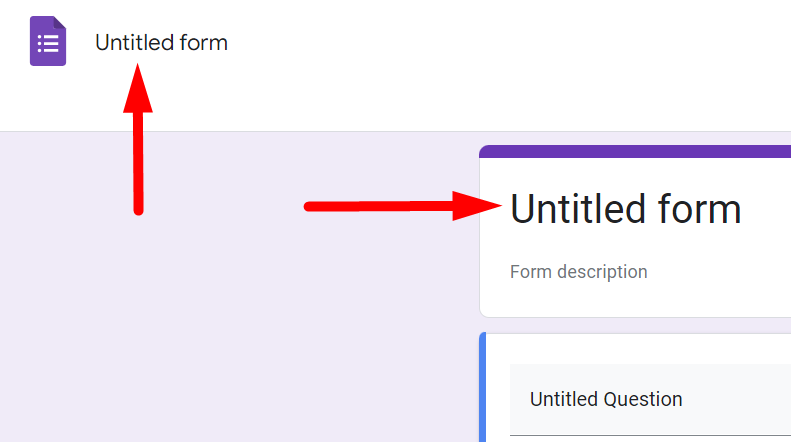
Below the title, add a brief description or instructions, such as "Please fill out this form to sign up for the event".
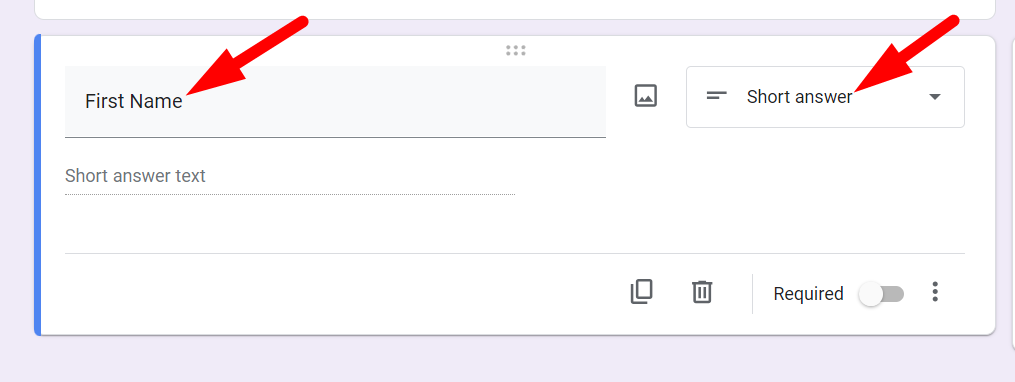
Step 3: Insert Fields for Participant
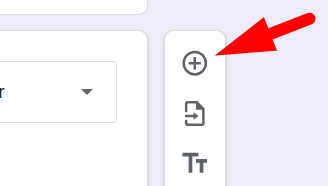
Click on the "Add Question" button to start adding fields.

Type "First Name" in the question field. Ensure the 'Short answer' type is selected.
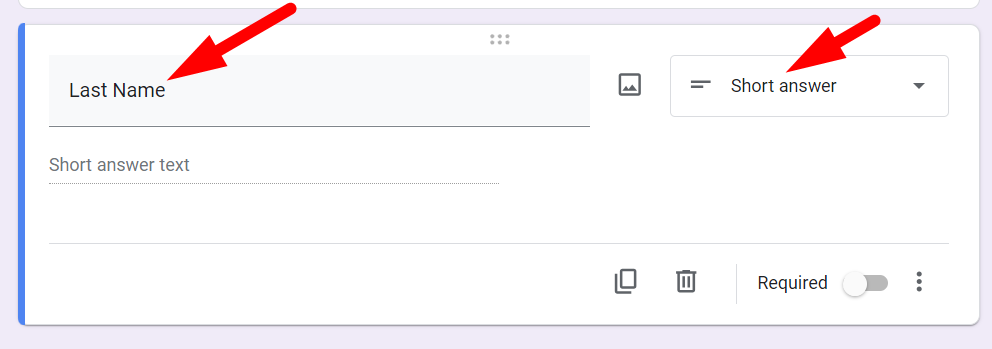
Click the "Add Question" button again.
Type "Last Name" and ensure 'Short answer' is selected.
Click "Add Question". Type "Email Address" in the question field.
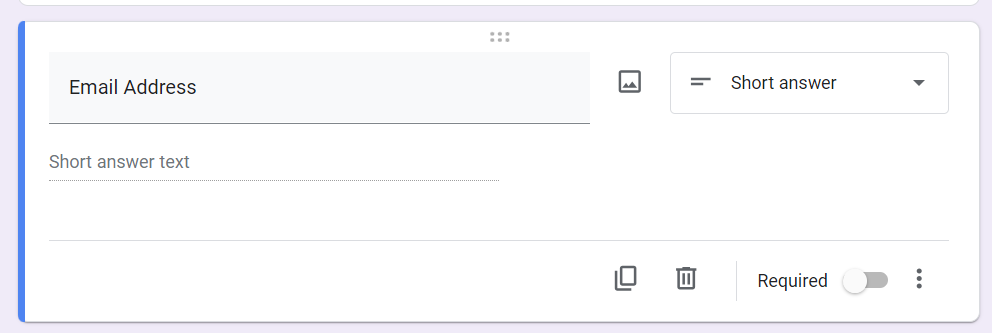
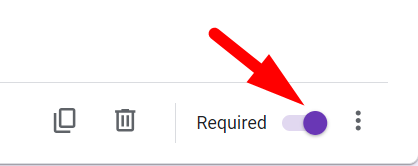
Note: Turn on the 'Required' toggle for all the questions. So that the respondents cannot submit the form without answering any questions.
Step 4: Incorporate a Dropdown for Time Slot Selection
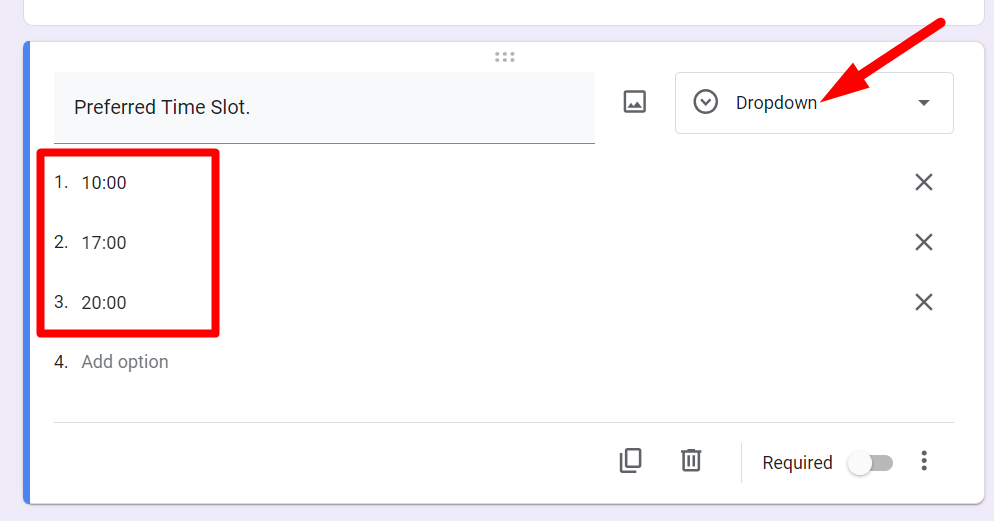
Click on "Add Question" again and create a field named "Preferred Time Slot."
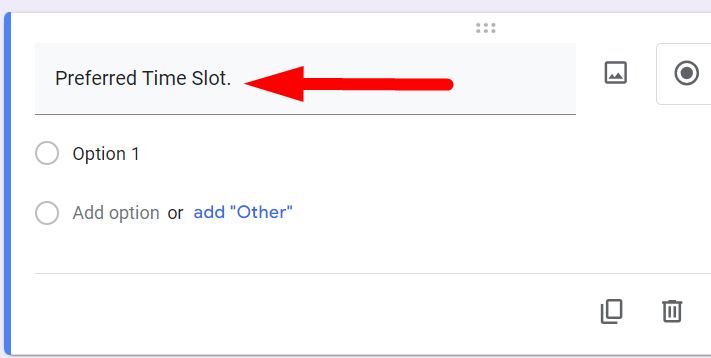
Select the 'Dropdown' question type and enter the available time slots as options, making it easy for participants to choose their preferred slot.
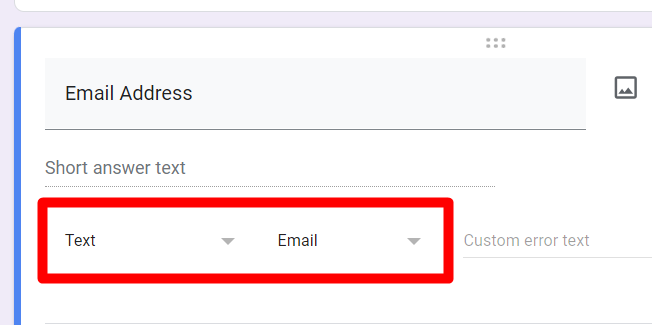
Step 5: Apply Response Validation for Email Input
Click on the three dots (options) on the email question and select 'Response validation'.
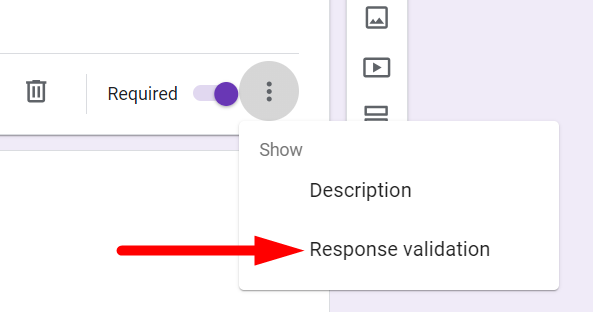
Choose 'Text' and then 'Email' to ensure participants input a valid email address format.
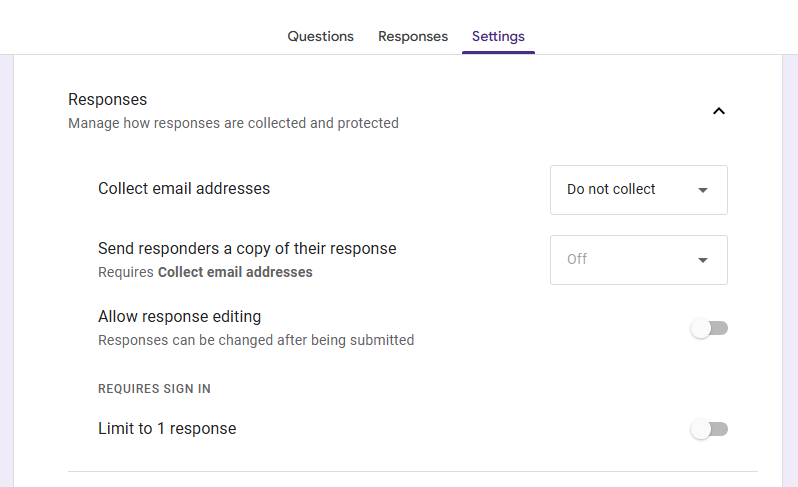
Step 6: Configure Your Form Settings
Once your questions are in place, open the Settings tab (gear icon) at the top of Google Forms to fine-tune how your sign-up sheet behaves. You’ll see three collapsible panels—Responses, Presentation, and Question defaults—each with handy switches and check-boxes:
Responses
-
Collect email addresses to stay in touch with registrants.
-
Send responders a copy so participants receive a confirmation email.
-
Allow response editing if you want people to fix mistakes later on.
-
Limit to 1 response to block duplicate sign-ups (requires sign-in).
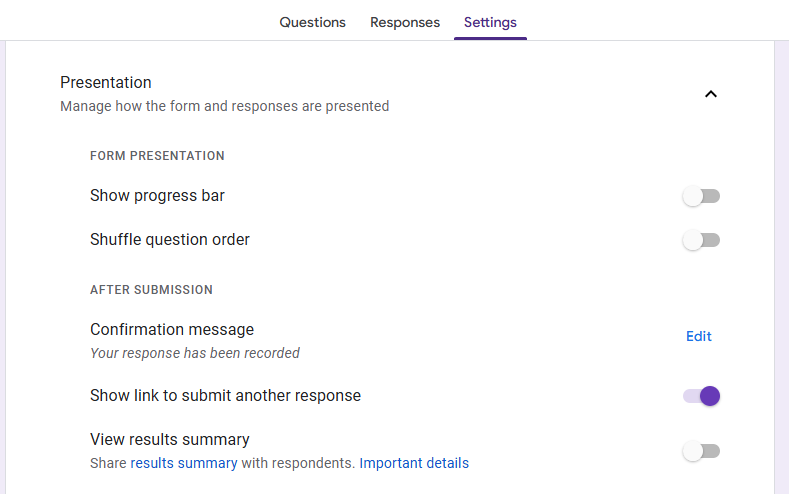
Presentation
-
Progress bar shows how far along users are (helpful for longer forms).
-
Shuffle question order for randomized surveys—usually off for sign-up sheets.
-
Confirmation message—write a custom note like “Thanks for registering! We’ll be in touch soon.”
-
Show link to submit another response if you expect one person to register multiple attendees.
-
Disable autosave to prevent partial answers from being stored in the browser.
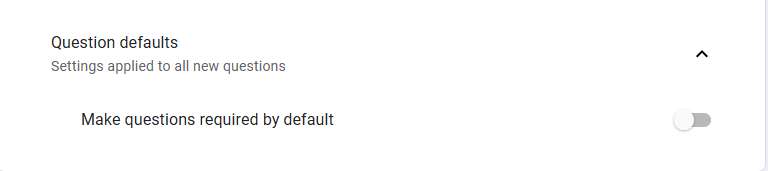
Question defaults
- Toggle Make questions required ON so every new field is mandatory by default, sparing you from incomplete entries.
Close the panel when you’re finished; your changes are saved instantly. With these settings dialed in, your sign-up sheet will collect cleaner data and give registrants a smoother experience.
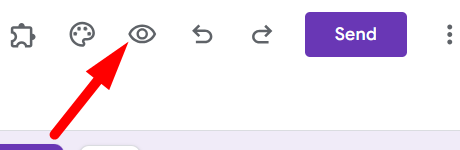
Step 7: Preview and Test the Form
Click on the eye-shaped ‘Preview’ icon at the top right to see how your form will appear to participants. Test all fields to ensure they work as expected.
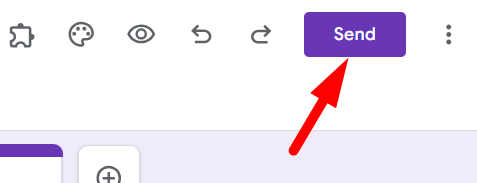
Step 8: Distribute the Form
Once satisfied with your form, click on the "Send" button in the top right corner to distribute.
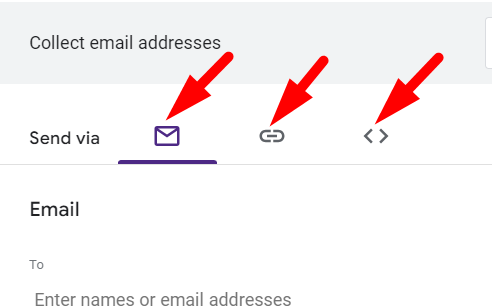
- Via Email: Enter the recipient's email address, subject, and message, then click ‘Send’.
- Via Link: Click on the 'Link' icon, copy the link, and share it through messages, social media, etc.
- Embed in Webpage: Click on the '< >' icon to get the embed code and paste it into your webpage's HTML.
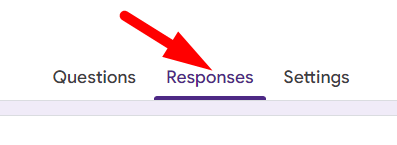
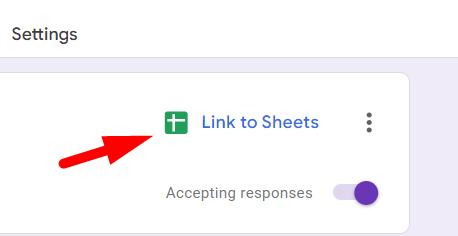
Step 9: Monitor Sign-Up Entries
Click on the ‘Responses’ tab at the top of your form to monitor and review the entries.
Optionally, link your responses to a Google Sheet for more detailed analysis by clicking on the green Sheets icon.
By following these steps, you'll have a professional and functional sign-up sheet ready to go.
Google Forms makes the process straightforward, and with this guide, you can ensure that your form is optimized for ease of use and efficiency.