How to Limit Responses in Google Forms (3 Ways)
There are 3 ways to limit responses in Google Forms.
- You can limit the response to one response per person by enabling the option of “Limit to 1 response” from the “Responses” tab.
- You can turn off receiving responses by disabling the “Accepting responses” toggle to “Not accepting responses” from the “Responses” tab.
- You can use Add-ons like “Form Limiter” with more customized control of receiving responses.
Let’s break down each method for you!
Method 1: Limit Response to One Person
Ensure unique responses for your Google Form by enabling the one-response-per-person feature.
This method requires respondents to sign in with a Google account, allowing only a single submission per account, thus maintaining the exclusivity and accuracy of your data collection.
You can achieve this by following these 4 steps:
- Open the Google Form you want to limit responses:

- Click on the “Settings” tab:

- Open the “Responses” section:

- Enable the “Limit to 1 response” toggle button:

When you turn this option on, you will receive a confirmation of the action by a pop-up message confirming that the respondent will not be shown a link to submit another response like below:

Method 2: Stop Accepting Responses At All
Control your data collection by manually disabling the response feature in Google Forms.
This straightforward approach lets you close the form to new responses whenever you've gathered sufficient data, without the need for additional add-ons or complex settings.
Follow these 4 simple steps:
- Open the Google Form you want to stop accepting responses.
- Click on the “Responses” tab:

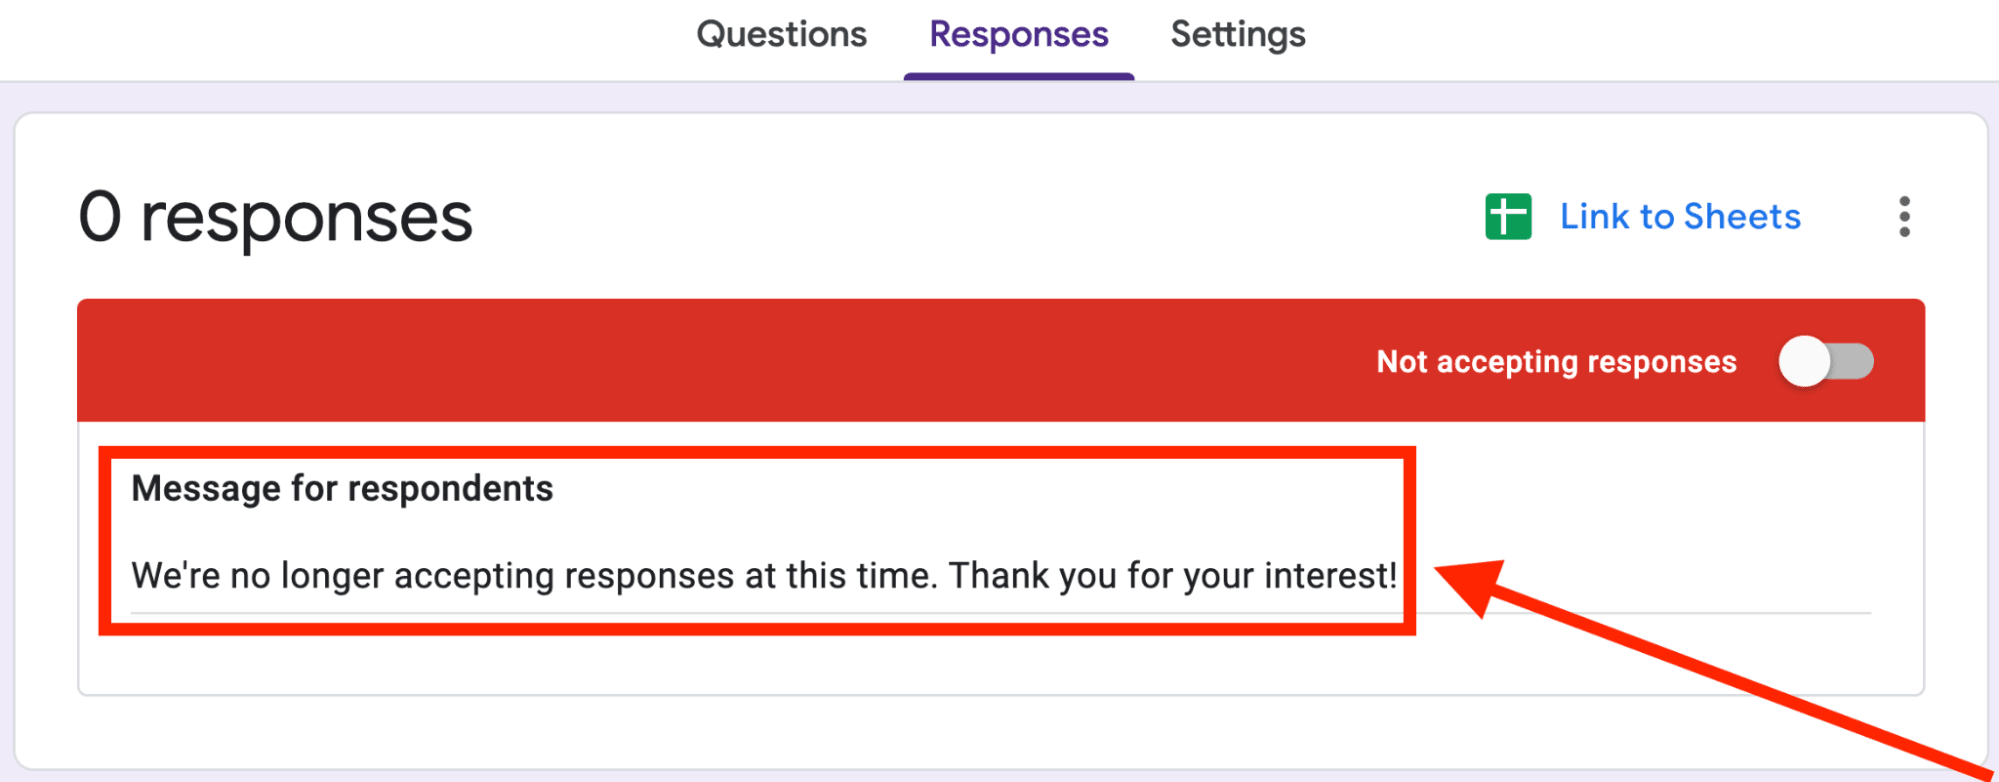
- Click & disable the “Accepting responses” toggle and turn it into “Not accepting responses”:

- Be nice! Leave a message about why you are not accepting responses anymore:

3 messages that you can use:
i. We're no longer accepting responses at this time. Thank you for your interest!
ii. Thank you for your willingness to participate. Please be advised that this survey has reached its conclusion and we are no longer accepting further responses. We appreciate your understanding and value the time you've taken to engage with us.
iii. Whoa there! Looks like our form ate too much data and needs a little break. We're not accepting more responses right now, but stay tuned for the next round of fun and questions!
Method 3: Use Add-ons
Enhance your Google Forms with add-ons to set advanced response limits, like capping submissions at a specific number or closing the form automatically on a certain date.
This method offers greater flexibility and precision in managing your form's availability and response collection.
Install any response-limiting add-on. For our example, we’ll use Form Limiter. But there are other options available also. Let’s break down the process for you:
- Click on the three-dot menu at the top right corner:

- Click on “Get add-ons”:

- Search “Form Limiter” in this search box:

- Click on the one that has been developed by New Visions Cloudlab:

- Install it by clicking on ‘Install’

- Grant permission by clicking ‘Continue’:

- Now go back to your form and click on the ‘Add-On’ icon at the top right:

- You’ll see ‘formLimiter’. Click on it:

- Click on “Set Limit”:

- Now you can set a custom limit of responses you want to receive for a form. Click “Save and enable” to make it work:

And that’s it! You can limit responses in Google Forms with any of these methods.
FAQs
Q: Can you limit slots on Google Forms?
A: Set a generic limit for each timeslot or choose individual limits for appointment slots. Each option gets eliminated after reaching its limit.
Q: How do I limit the number of submissions in Google Forms?
A: Use Form Limiter Add-On: 1. Open Google Form. 2. Access Form Limiter. 3. Set response limit (e.g., 10). 4. Apply and Save.
Q: How do I restrict submissions in Google Forms?
A: 1. Create/open a Google Form. 2. Go to Settings. 3. Select “General” Settings. 4. Enable “Limit to 1 Response”. 5. Save.
Q: Are there limitations to Google Forms?
A: Google Forms, free or paid, has no limit on the number of forms. Suitable for surveys, quizzes, event registrations, and more.