
How to Make a Google Form Public: A Step-by-Step Guide
Fast navigation
In 5 simple steps, this guide will show you how to make a Google Form public.
Ensuring your form is accessible to everyone can significantly increase its reach and response rate.
So let’s dive in and make your Google Form public!
Steps:
1. Step 1: Open Your Google Form
2. Ensure "Limit to 1 Response" is Off
3. Optional - Turn Off "Collect Email Addresses"
4. Share Your Google Form
5. Test If Your Google Form is Public
Step 1: Open Your Google Form Settings
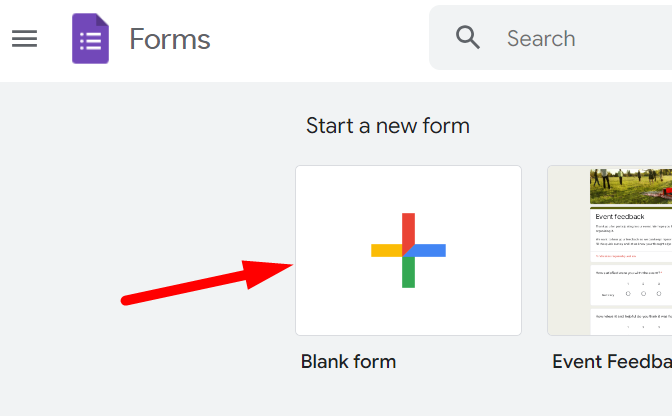
Open Google Forms and log into your Google account. Open the form you want to make public or create a new one by clicking the plus sign under "Start a new form."
Step 2: Ensure "Limit to 1 Response" is Off
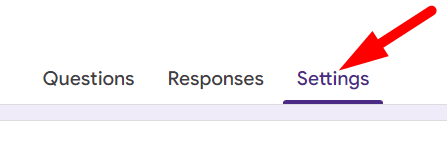
Click on the Settings tab at the top of the form.
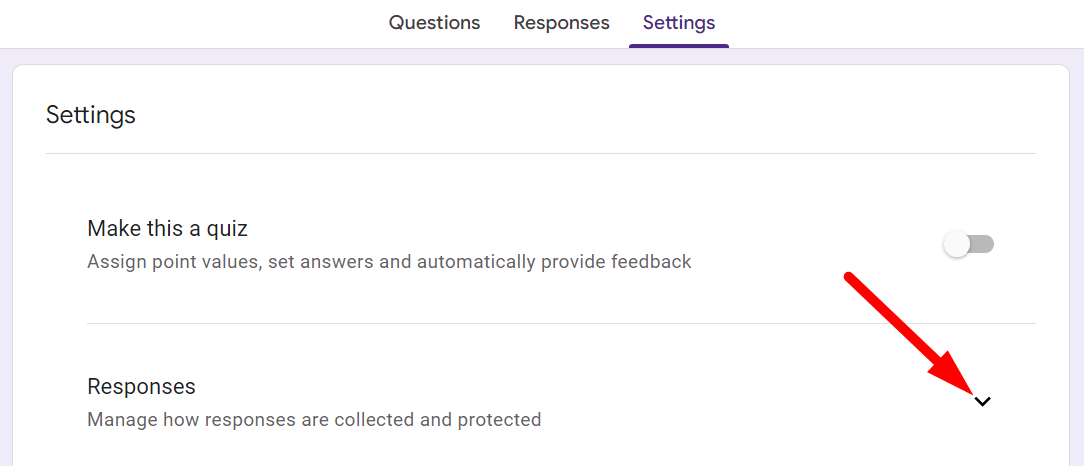
Click on the drop down arrow right to the ‘Responses.
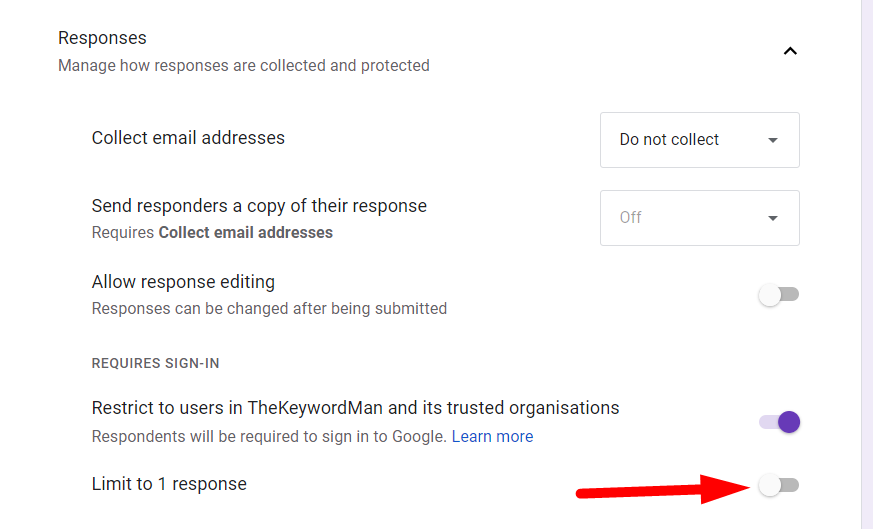
Under the Responses section, ensure the "Limit to 1 response" option is turned off.
This setting ensures that anyone can submit responses without signing into a Google account.
Step 3: Turn Off "Collect Email Addresses"
Under the Responses section in the Settings tab, you should choose to “Do not collect” in the "Collect email addresses" option.
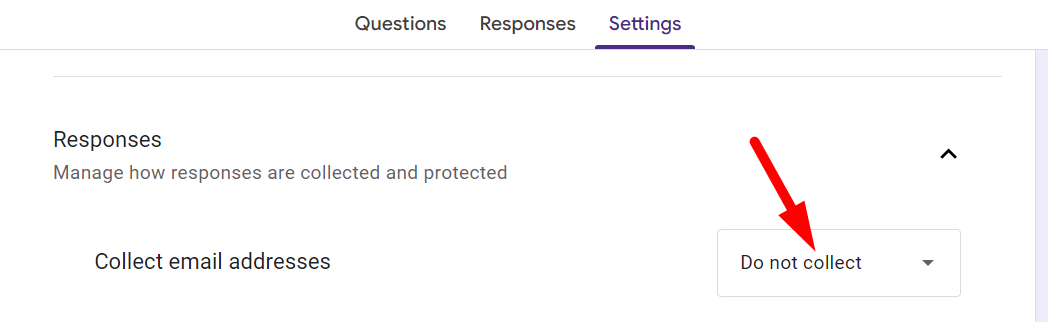
While this is not necessary for making the form public, turning it off ensures that respondents can fill out the form without providing their email addresses, which can increase response rates.
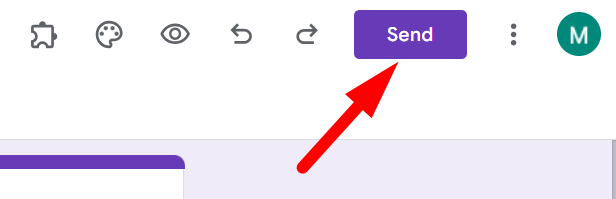
Step 4: Share Your Google Form
Click the Send button located at the top right corner of the form.
Choose how you'd like to share your form:
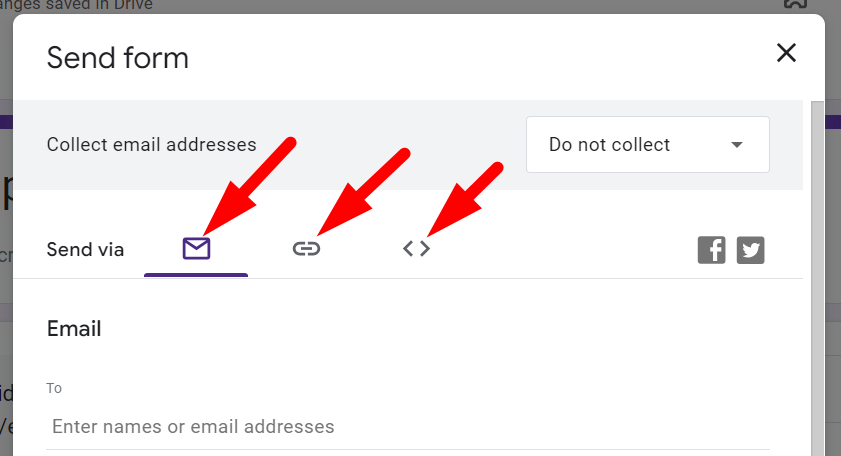
Email: Send the form directly to email addresses. You can include a subject line and message with your invitation.
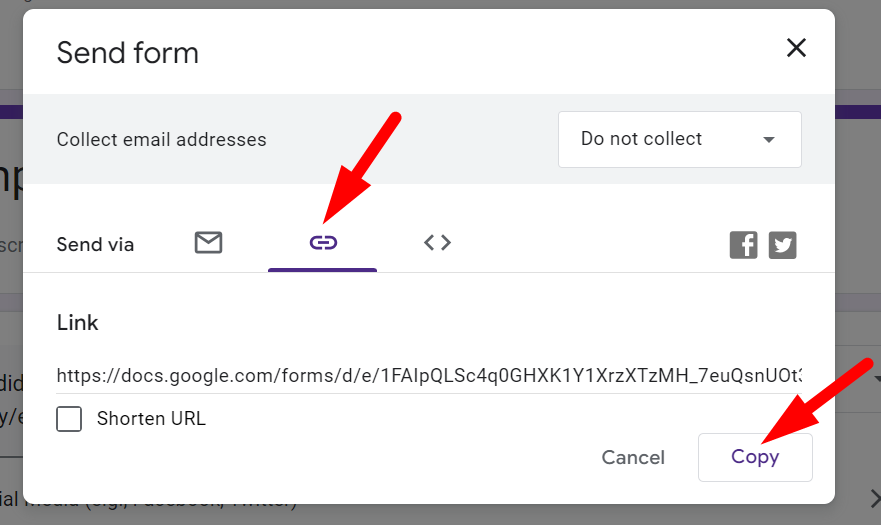
Link: Google Forms will generate a custom link that you can copy and share. You can shorten the link for convenience.
Embed HTML: Copy the HTML code to embed your form directly onto a webpage.
Step 5: Test If Your Google Form is Public
To ensure your Google Form is public, follow these steps:
Click the Send button and copy the link.
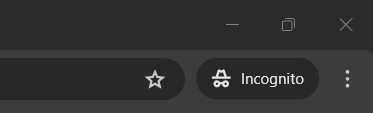
Open a browser where you are not signed into your Google account or open an incognito window. Paste the copied link into the URL field.
If the form opens without requiring a sign-in, your form is public.
If it prompts for a sign-in like the image below.
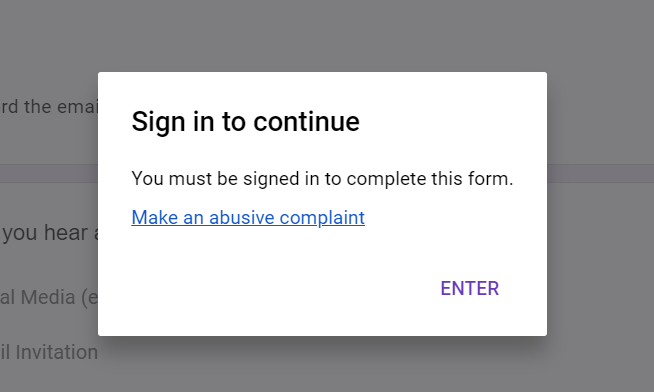
Check your settings to ensure "Limit to 1 response" is off and the "Collect email addresses" option is “Do not collect”.
How to Make a Google Form Public but Not Editable
“Google Forms automatically blocks visitors from changing questions or settings—you control editing rights. To keep the form open to everyone yet 100 % locked from edits, follow these checks:
1. Don’t add editors or collaborators. In the Form editor, click “⋮ › Add collaborators” and ensure no one is listed under People with access.
2. Send, don’t share to edit. Use the Send button, copy the public link or embed code, and distribute that link only.
3. Confirm general access is restricted for edits. In the share dialog, under General access, choose Restricted (or “Anyone with the link › Viewer”)—this lets anyone fill the form while preserving your sole editing rights.
4. Test it. Open the link in an incognito window; you should see the live form but no gear-icon or editing menu.
By keeping collaborators empty and access set to “Viewer,” respondents can submit answers freely without ever altering your questions.”
Why Make a Google Form Public?
Making your Google Form public removes accessibility barriers, allowing anyone with the link to view and submit responses. This is particularly useful for:
- Educational surveys: Collecting feedback from students, parents, or faculty members.
- Customer feedback forms: Gathering insights from a broader audience to improve products or services.
- Event registrations: Allowing easy sign-ups for public events without requiring users to log in.
- Public opinion polls: Engaging with a wider community for opinions on various topics.
Conclusion
Making a Google Form public is a straightforward process that can greatly enhance its accessibility and response rate.
By following the steps outlined in this guide, you can ensure that your form reaches a wider audience, whether for educational purposes, customer feedback, event registrations, or public opinion polls.
Remember to test your form to confirm it is public, and utilize the sharing options that best suit your needs.