How to Sign a Word Document (Easy Guide)
Fast navigation
- Step 1: Write Your Signature on Paper//
- Step 2: Take a Photo of Your Signature//
- Step 3: Insert the Signature into Word//
- Step 4: Change the Text Wrapping//
- Step 5: Crop the Extra White Space//
- Step 6: Remove the Background//
- Step 7: Save the Clean Signature (Very Important)//
- Optional: Make the Signature Darker//
- Final Step: Resize and Position
Don’t know how to sign a Word document professionally?
If you want your signature to look exactly like your real one, not something drawn with a mouse, this method is for you.
In this guide, I’ll show you step-by-step how to insert a real handwritten signature into Microsoft Word and clean it properly.
Let’s get started.
Steps:
- Write your signature on paper
- Take a photo of your signature
- Insert the image into Word
- Change text wrapping
- Crop the image
- Remove the background
- Save and reuse your signature
Step 1: Write Your Signature on Paper
Take a clean white sheet of paper and sign your name clearly using a dark pen (preferably black or blue).
Make sure:
- The paper is clean
- The signature is bold
- There are no shadows on the page
This will make editing much easier later.
Step 2: Take a Photo of Your Signature
Now take a clear photo of your signature using your phone.
Tips:
- Place the paper on a flat surface
- Ensure good lighting
- Avoid shadows
- Keep the camera straight
Once done, transfer the image to your computer. You can:
- Email it to yourself
- Use USB
- Use cloud storage
Step 3: Insert the Signature into Word
Open your Word document.
Click on Insert → Pictures
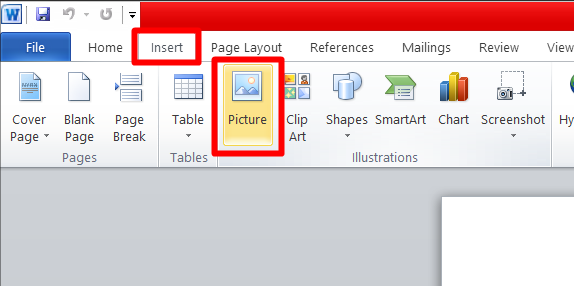
Select your signature image and click Insert.
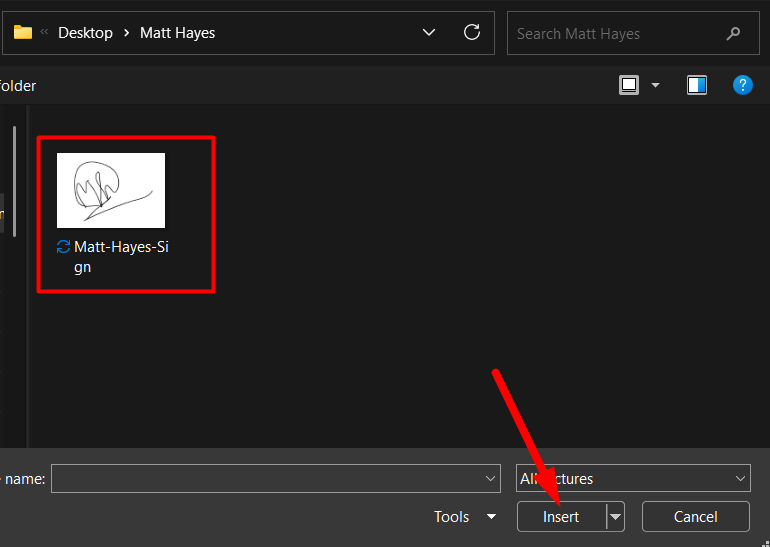
The image will now appear inside your document.
Step 4: Change the Text Wrapping
At first, you may not be able to move the image freely.
To fix this:
- Right-click on the image
- Select Wrap Text
- Click In Front of Text
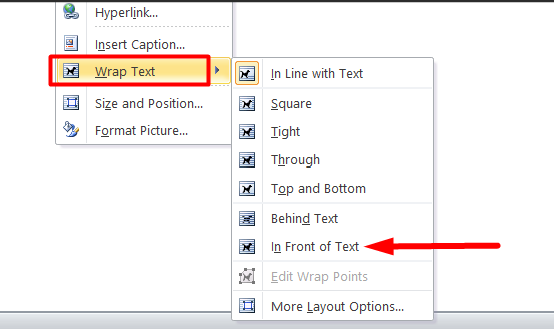
Now you can move your signature anywhere in the document.
Step 5: Crop the Extra White Space
Your image probably has a lot of unnecessary white background.
Here’s how to remove it:
- Click on the image
- Go to Picture Format
- Click Crop
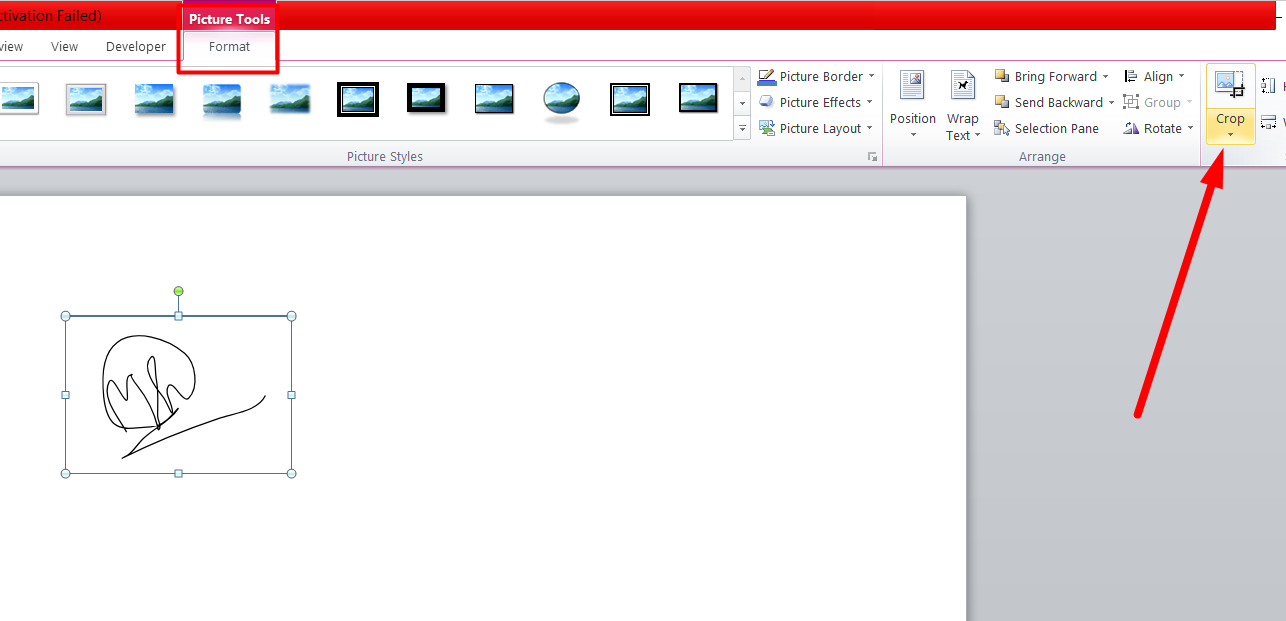
You will see black crop handles around the image.
Drag them inward to remove extra white space around the signature.
Press Enter when finished.
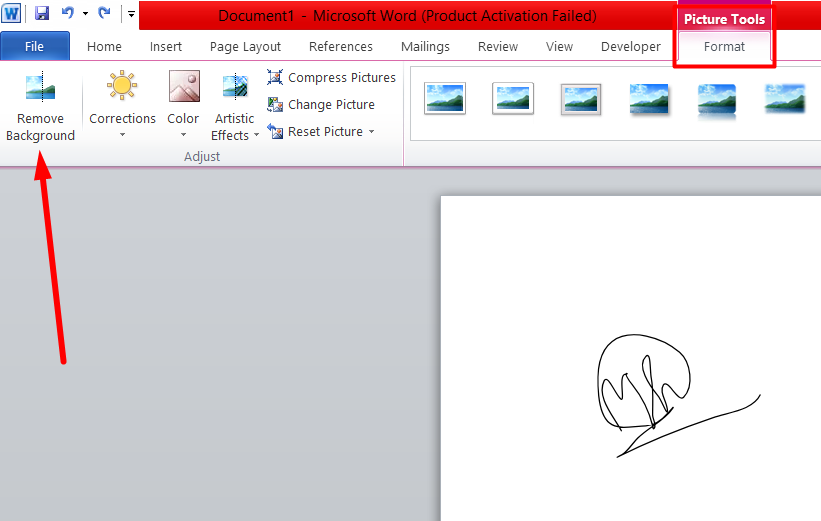
Step 6: Remove the Background
Now let’s clean it professionally.
- Select the image
- Go to Picture Format
- Click Remove Background
You will see a pink overlay.
Pink area = what will be removed.
Microsoft Word automatically detects the background, but sometimes you need to refine it.
At the top, you’ll see:
- Mark Areas to Keep
- Mark Areas to Remove
Use:
- “Mark Areas to Keep” to protect signature strokes
- “Mark Areas to Remove” to eliminate extra background

If you make a mistake, press:
Ctrl + Z
Once you’re satisfied, click Keep Changes.
Now your signature will have a clean transparent background.
Step 7: Save the Clean Signature (Very Important)
This step saves you time in the future.
Right-click on your cleaned signature.
Click Save as Picture.
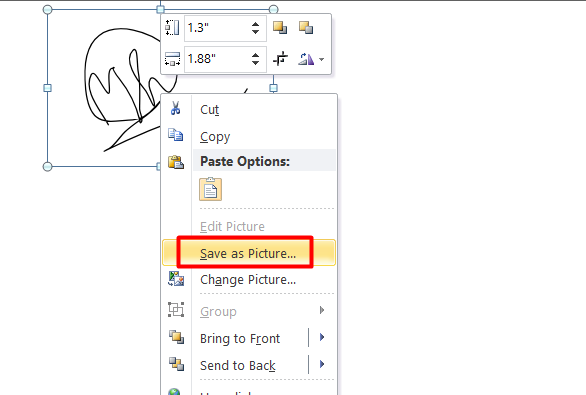
Save it somewhere safe on your computer.
Now you can reuse it in any document without repeating the editing process.
Optional: Make the Signature Darker
If your signature looks slightly gray instead of deep black:
- Select the image
- Go to Picture Format → Color
- Adjust the contrast or recolor options
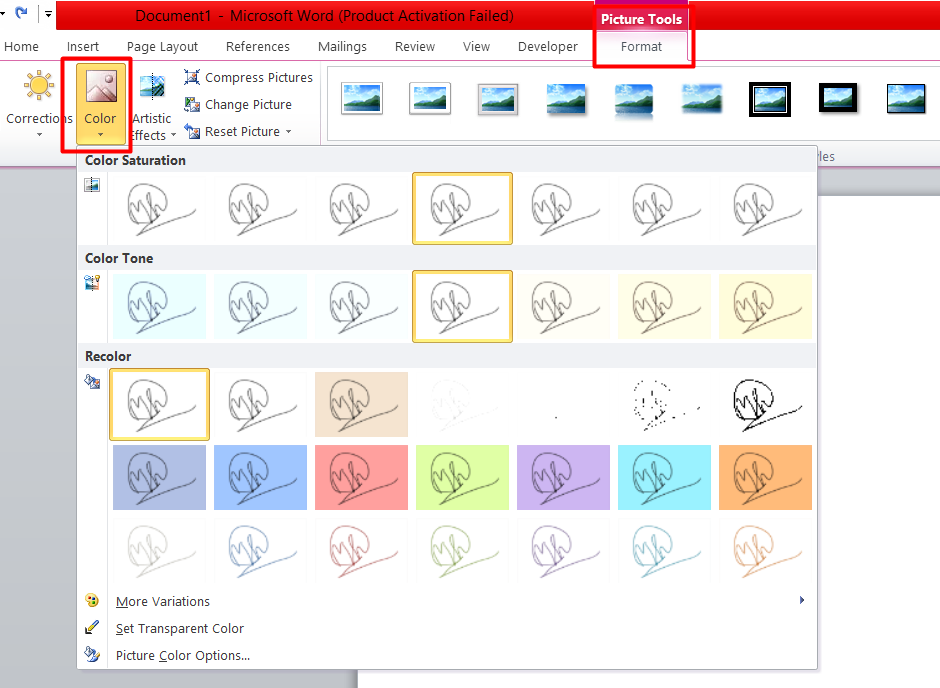
This will make your signature look sharper and more professional.
Final Step: Resize and Position
Now:
- Hold Shift
- Drag the corner to resize (this keeps proportions correct)
- Move it to the bottom of your document
Place it above your typed name.
And you're done.
That’s It!
Now you know how to sign a Word document using a real handwritten signature.
This method:
- Looks professional
- Works in older Word versions
- Can be reused anytime
- Is perfect for contracts and official documents
Once you save your signature image, signing documents becomes a 10-second task.