How to Create an Anonymous Survey in Microsoft Forms (Step-by-Step)
Fast navigation
- Step 1: Access Microsoft Forms//
- Step 2: Create or Open Your Form//
- Step 3: Open Form Settings//
- Step 4: Turn Off “Record Name” (Most Important Step)//
- Step 5: Set Who Can Respond//
- Step 6: Disable Email Collection & Response Receipts//
- Step 7: Review Your Questions//
- Step 8: Test Your Anonymous Form//
- Step 9: Share Your Anonymous Survey//
- Important Limitations You Should Know//
- Personal vs Work Account Difference//
- What Does a Proper Anonymous Response Look Like?//
- When Should You Use Anonymous Surveys?//
- Conclusion
Don’t know how to create an anonymous survey in Microsoft Forms?
Don’t worry, it only takes a few settings adjustments.
In this guide, I’ll walk you through everything step-by-step so you can confidently create a truly anonymous Microsoft Form without accidentally collecting names or email addresses.
Let’s get started.
Steps:
- Access Microsoft Forms
- Create or Open Your Form
- Open Form Settings
- Turn Off “Record Name”
- Set Who Can Respond
- Disable Email Collection
- Review Your Questions
- Test Your Anonymous Form
- Share Your Anonymous Survey
Step 1: Access Microsoft Forms
First, go to:
Sign in using your Microsoft account.
Step 2: Create or Open Your Form
Click on “New Form” to create a new survey
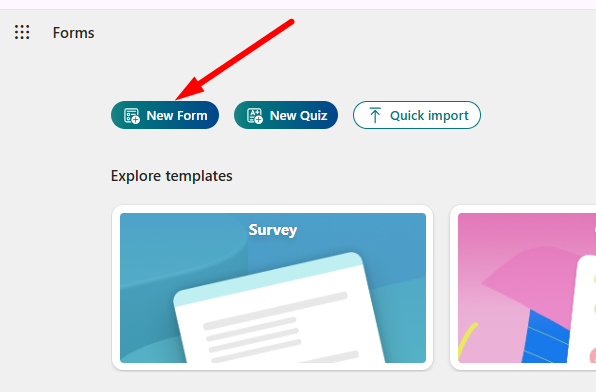
Open an existing form you want to make anonymous.
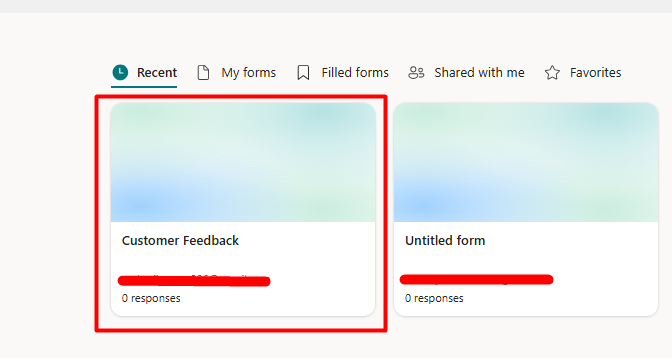
Give your form a proper title and description.
For example:
Title: Customer Feedback
Step 3: Open Form Settings
Now this is where anonymity is controlled.
Click on the Settings (⚙️ gear icon) at the top right corner.

In some versions, you may need to click the three dots (…) first, then choose Settings.
This opens the privacy and response configuration panel.
Step 4: Turn Off “Record Name” (Most Important Step)
This is the critical step.
Inside the Settings panel, look under:
“Who can fill out this form”
If you're using a work or school account, you will see an option called:
☑️ Record name
By default, this is turned ON.
Uncheck it.
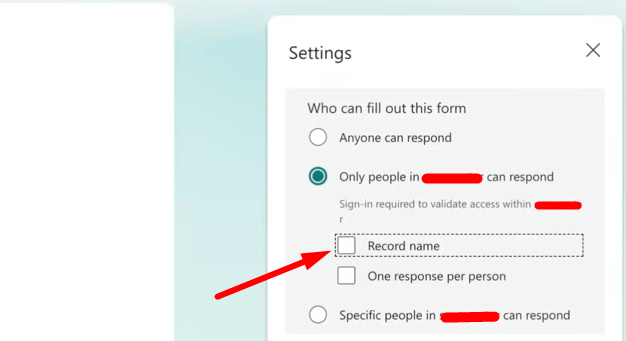
When “Record name” is OFF:
- Microsoft Forms will NOT attach names
- Microsoft Forms will NOT attach email addresses
- Responses will appear as “Anonymous”
If you skip this step, responses will include names automatically.
Step 5: Set Who Can Respond
You’ll see these options:
- Anyone with the link can respond
- Only people in my organization can respond
- Specific people in my organization can respond
For maximum anonymity, select:
Anyone with the link can respond
Why?
Because this removes the sign-in requirement completely.
Even if “Record name” is OFF, forcing sign-in may still make respondents uncomfortable.
⚠️ If this option is greyed out:
- Your IT admin may have restricted external sharing
- Or your form contains a file upload question (more on this later)
Step 6: Disable Email Collection & Response Receipts
Even if “Record name” is OFF, there are two more things to check.
Look for:
- Send responders a copy of their responses
- Collect email addresses
Turn them OFF.
Why?
Because sending response receipts automatically captures email addresses, which defeats anonymity.
Step 7: Review Your Questions
Now, carefully check every question in your survey.
If you have questions like:
- What is your name?
- Enter your email
- Employee ID
- Department (if very small team)
Even if system tracking is OFF, those answers will still reveal identity.
Remove them.
Or make them optional.
True anonymity means: No system tracking + No identifying questions.
Step 8: Test Your Anonymous Form
Before sharing it, test it.
Click on the Preview (👁️ eye icon) at the top right.
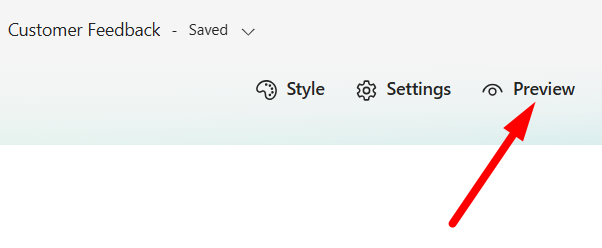
You should see a message at the top of the form that says:
“This form will not automatically collect your details”.
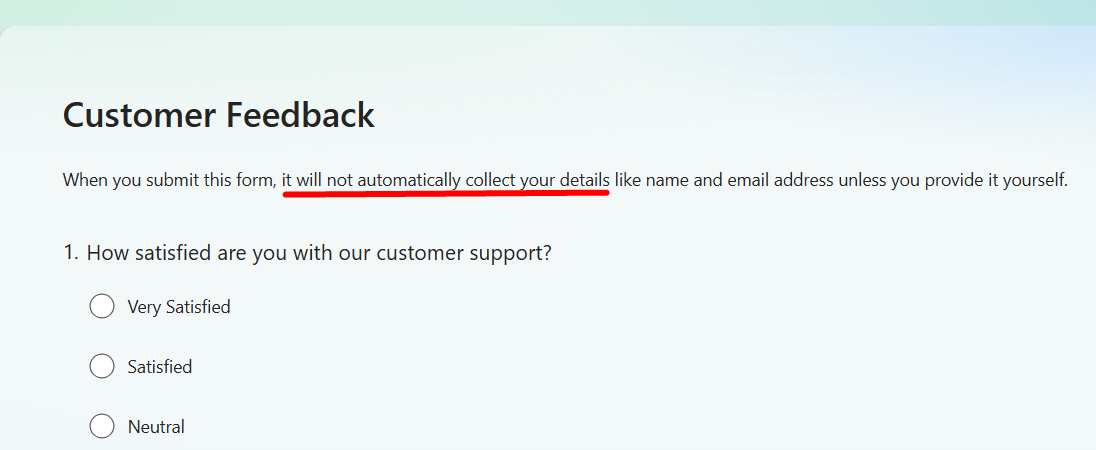
If you see: “This form will record your name”
Go back and fix your settings.
You can also test by opening the form link in an Incognito / Private browser window.
This helps you see exactly what respondents will experience.
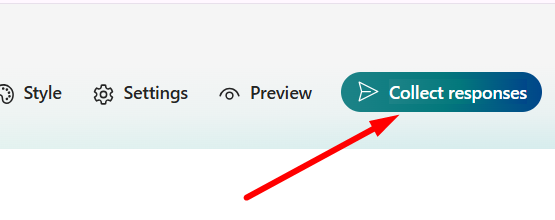
Step 9: Share Your Anonymous Survey
Now click on:
Collect responses
You can share your survey via:
- Shareable Link – Copy and send anywhere
- Email – Send directly from Forms
- QR Code – For events or offline sharing
- Embed Code – Add to your website
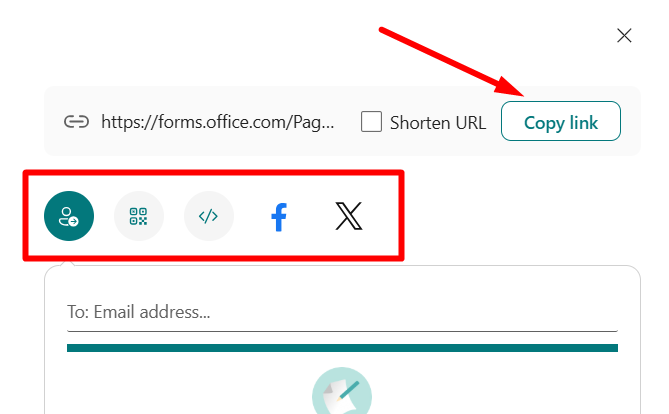
Since your form does not require sign-in and does not record names, all responses will remain anonymous.
Important Limitations You Should Know
Before you finish, here are a few important things most people don’t realize:
1. You Cannot Have Anonymous File Uploads
If your form contains a File Upload question:
- Microsoft requires sign-in
- “Anyone with the link” becomes unavailable
- True anonymity becomes impossible
If you need anonymous feedback + file uploads, use two separate tools.
2. You Cannot Track Who Hasn’t Responded
Anonymous surveys and response tracking don’t work together.
If you can see who hasn’t responded, you can logically figure out who did.
So Microsoft Forms does not allow both.
3. You Cannot Retroactively Remove Names
If you accidentally collected responses with “Record name” turned ON:
- Those responses will permanently contain names
- Turning it OFF only affects future responses
There is no undo.
Personal vs Work Account Difference
If you are using a personal Microsoft account (Outlook, Hotmail):
- There is no “Record name” toggle
- Forms are anonymous by default
- Only “Anyone with the link can respond” is available
If you are using a Microsoft 365 work/school account:
- You must manually disable “Record name”
- More sharing control options are available
What Does a Proper Anonymous Response Look Like?
When you go to the Responses tab:
{Screenshot}
If anonymity is properly configured:
- The ‘Respondent’ column will show ‘Anonymous’.
- No email addresses will appear
- Only timestamps and answers will be visible
That’s how you confirm everything is working correctly.
When Should You Use Anonymous Surveys?
Anonymous surveys are useful for:
- Employee feedback
- Workplace culture reviews
- Student evaluations
- Sensitive topics
- Honest product feedback
People answer more honestly when they know their identity isn’t attached.
Conclusion
That’s how you create an anonymous survey in Microsoft Forms.
Just remember:
✔ Turn off “Record name” ✔ Use “Anyone with the link can respond” ✔ Disable email collection ✔ Remove identifying questions ✔ Test before sharing
Follow these steps carefully, and your Microsoft Forms survey will remain truly anonymous.