
How to Create a Form in Airtable
Fast navigation
Want to learn how to create a form in Airtable?
Whether you're collecting customer feedback, streamlining internal requests, or managing data entry, Airtable forms make the process simple and powerful.
This guide breaks down everything you need to know, from creating your first form to publishing and sharing it, in clear, easy-to-follow steps.
Let's get started.
Steps:
- Go to the Workspace
- Navigate to the Forms Tab
- Create a New Form
- Configure Your Form Settings
- Add and Customize Your Form Fields
- Publish Your Form
- Share or Embed Your Form
Step 1: Go to the Workspace
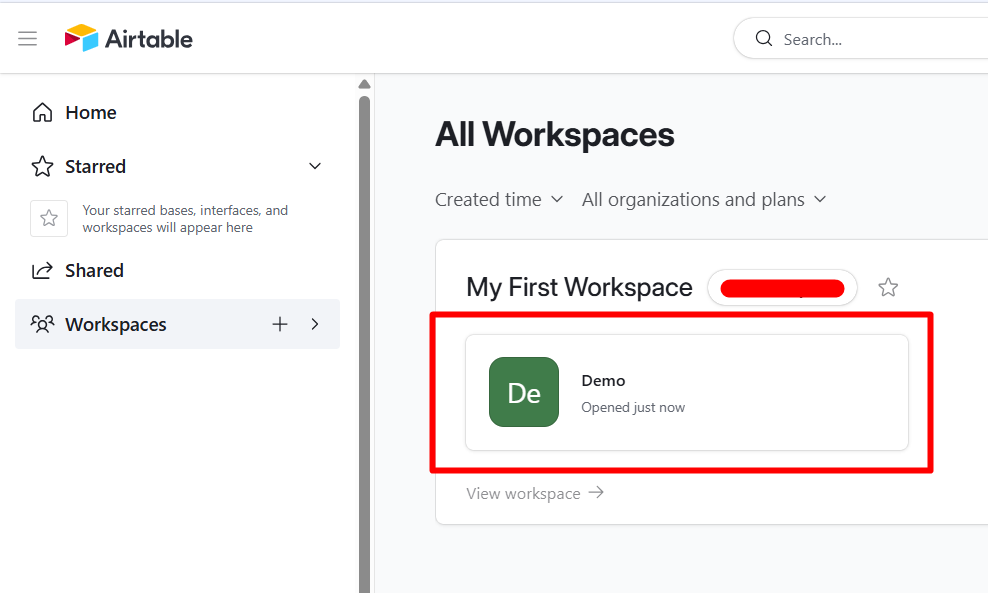
Head over to your Airtable homepage and open the workspace where you want to create your form.
Step 2: Navigate to the Forms Tab
Once you're inside your workspace, look toward the upper part of the screen and click on Forms.
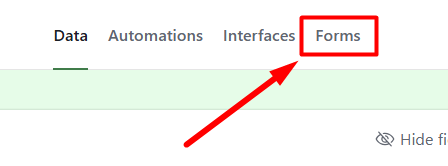
This will open the forms interface, where you can manage all forms connected to this base.
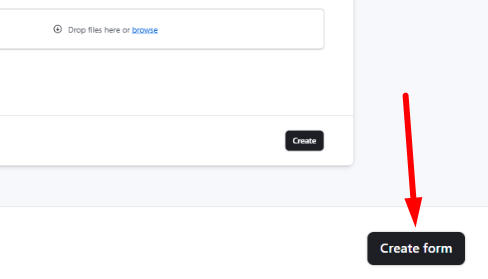
Step 3: Create a New Form
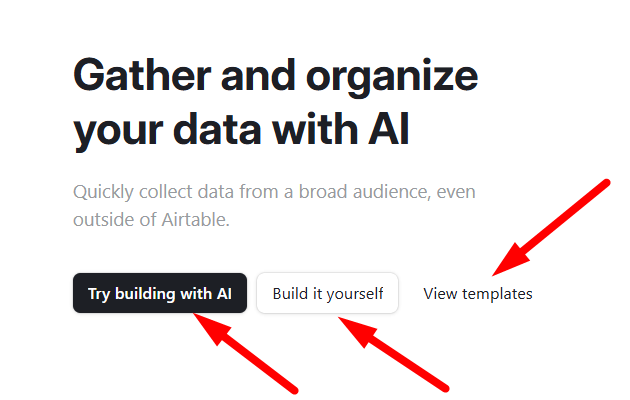
On the forms page, you'll see three options:
- Try building with AI
- Built it yourself: Start building a form from scratch
- View templates: Browse pre-built form templates for inspiration
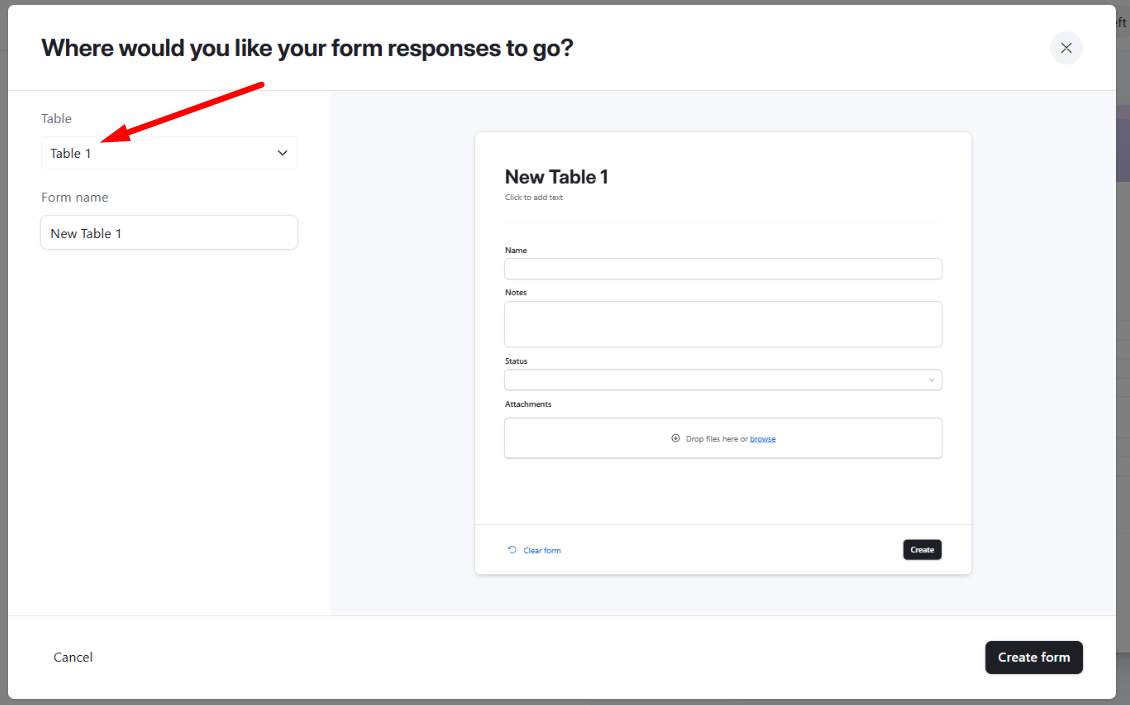
After clicking Built it yourself, a configuration window will appear asking you to select an existing table, or create a new one, to store your form submissions.
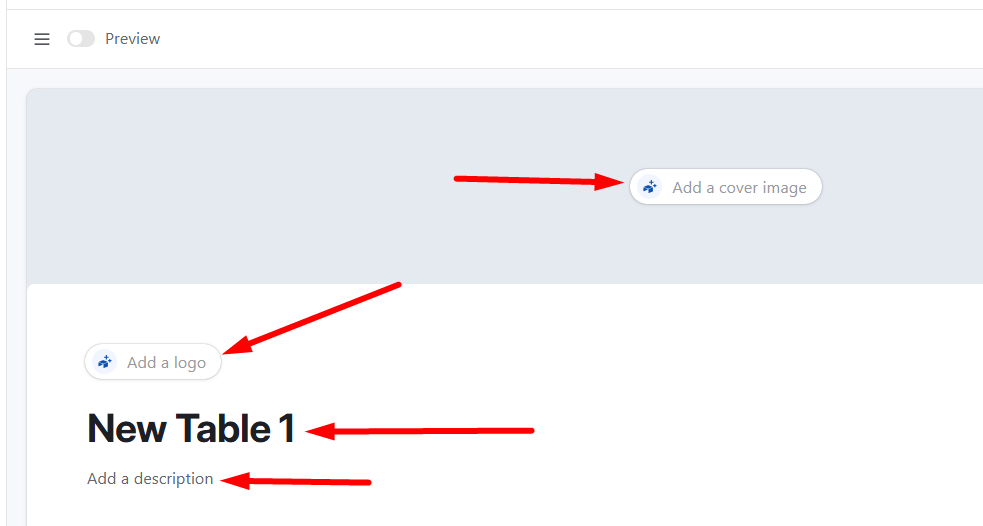
Step 4: Configure Your Form Settings
Once your form is created, you'll land on the form builder canvas. This is where you can customize everything about how your form looks and functions.
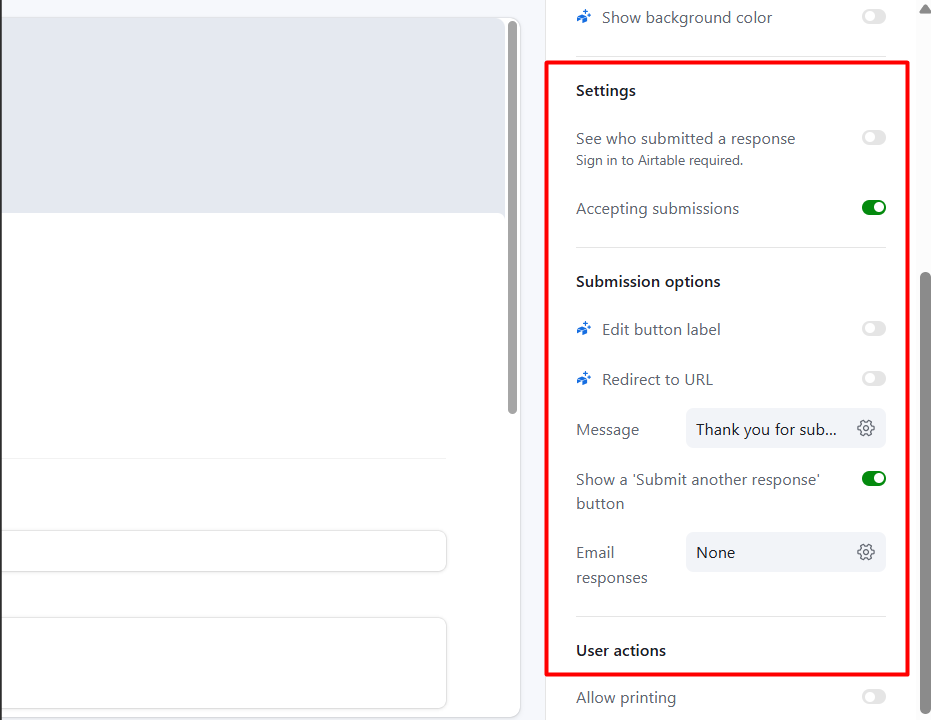
There are two places where you can configure settings:
On the canvas (center of the screen):
- Form cover image: Add a branded banner image to the top of your form (paid plans only)
- Form logo: Upload your logo to appear on the form (paid plans only)
- Form title: Give your form a clear, descriptive name
- Form description: Add a brief explanation of what the form is for
- General form properties (like submission confirmation messages)
- Individual field properties
- Form group properties
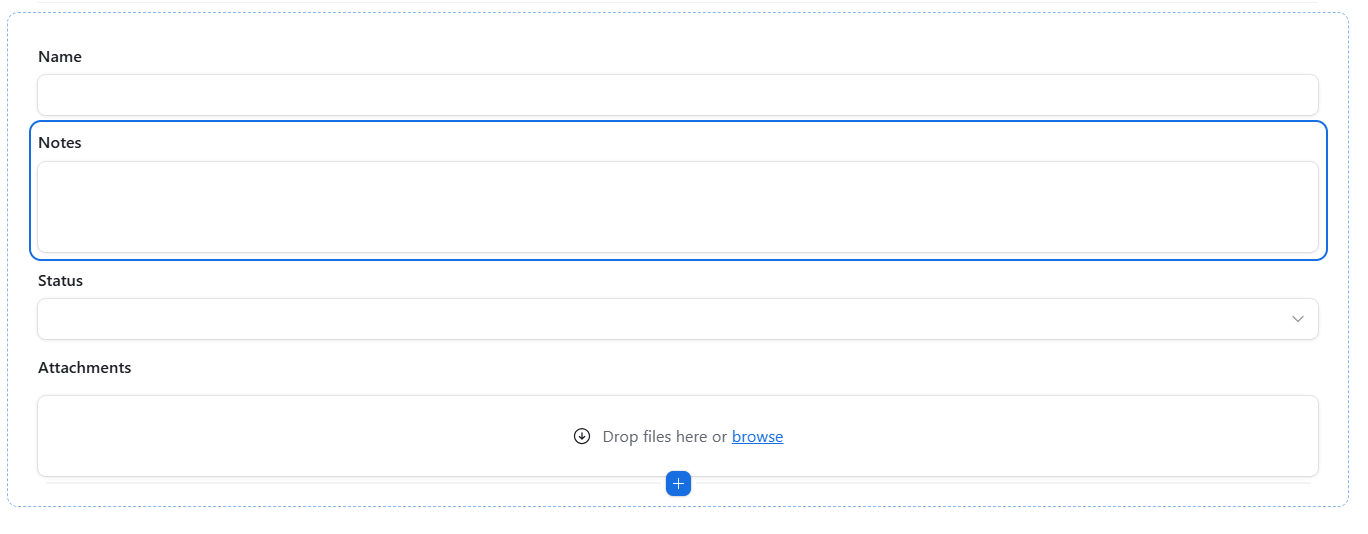
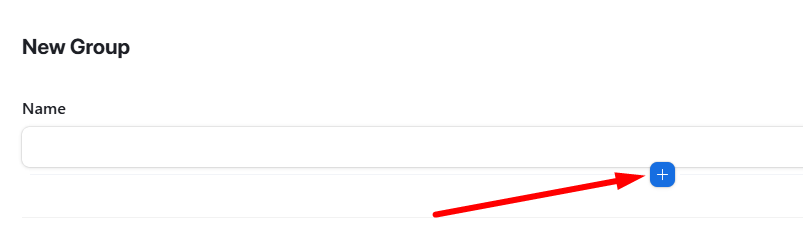
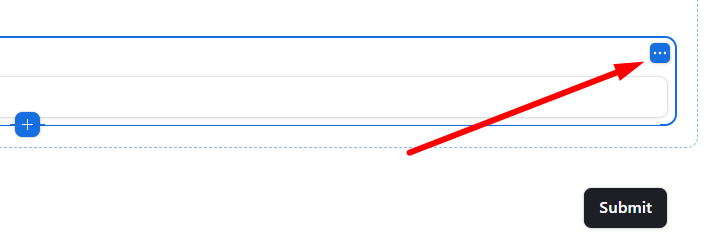
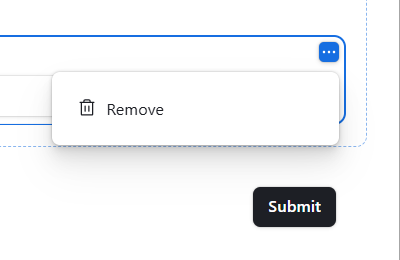
Step 5: Add and Customize Your Form Fields
This is where you decide what information you want to collect.
Your form fields are pulled directly from the columns in your connected Airtable table. You can add, remove, reorder, and resize fields directly on the canvas.
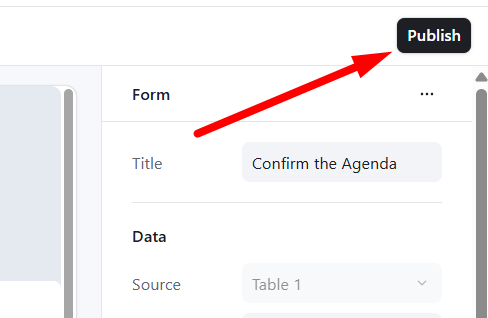
Step 6: Publish Your Form
Once you're happy with how your form looks and functions, it's time to make it live.
Click the Publish button in the upper right corner of the form builder.
After publishing, the live version of your form will open, where you can configure share settings and copy the form link.
Important: Any time you make changes to your form after the initial publish, you'll need to click Publish form again for those changes to go live for respondents.
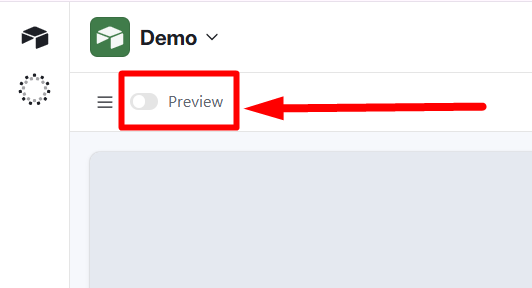
You can also toggle on a Preview at any point during the building process (upper left of the screen) to see exactly what your form looks like from a respondent's perspective before publishing.
Step 7: Share or Embed Your Form
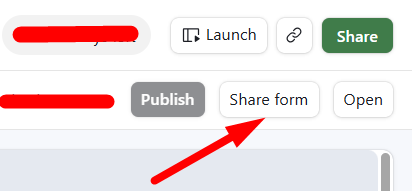
After publishing, click the Share form button to open your sharing options.
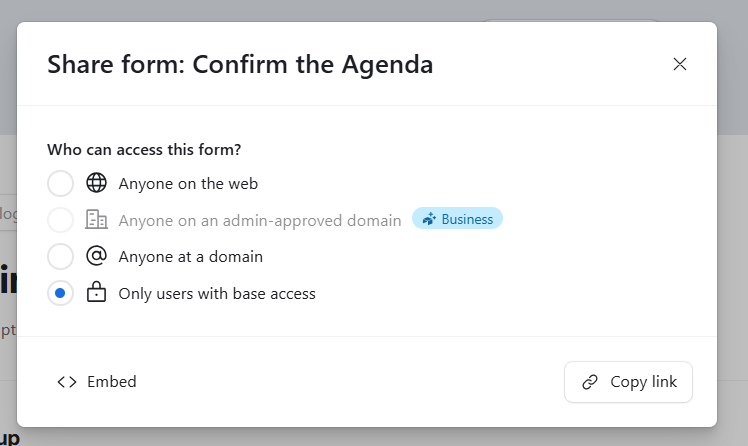
Airtable gives you several ways to control who can access and submit your form:
Anyone on the web: Anyone can fill out the form, even without the link being shared with them directly. Use this with caution for sensitive data.
Anyone at {Your organization}: Available on Business and Enterprise Scale plans. Limits access to people within your organization.
Anyone at a domain: Available on paid plans. Restricts access to people with a specific email domain (e.g., yourcompany.com). Respondents must sign into Airtable to submit.
Only users with base access: Restricts the form to existing base or workspace collaborators only.
From setting up your fields to publishing and sharing, Airtable's form builder gives you a flexible and powerful way to collect data from anyone, inside or outside your organization.
Once responses start coming in, you can view and analyze all submissions directly inside your connected Airtable table, or set up automations to trigger workflows based on new form submissions.