How To Group Worksheets In Excel
Fast navigation
Working with data in Excel often requires creating multiple sheets in a workbook. Going back and forth, modifying, updating, formatting, and applying formulas in each sheet is hectic and time-consuming. Excel has a grouping feature that allows users to avoid the grind by linking two or more worksheets together so that any action performed in one sheet can be automatically replicated to all the other sheets in the group. This feature is especially useful when you want to maintain consistent formatting and data across your workbook.
Here’s How to Quickly Group Multiple Worksheets in Excel
You can group any number of sheets. There is no limit. However, you must be careful when entering data in a worksheet group. Grouped actions cannot be undone. If you make a mistake while the sheets are grouped, you must correct each sheet individually.
This section shows you how to group multiple worksheets. Follow the steps below to work your way around grouping worksheets quickly.
Step 1 - Select The WorkSheets You Want To Group
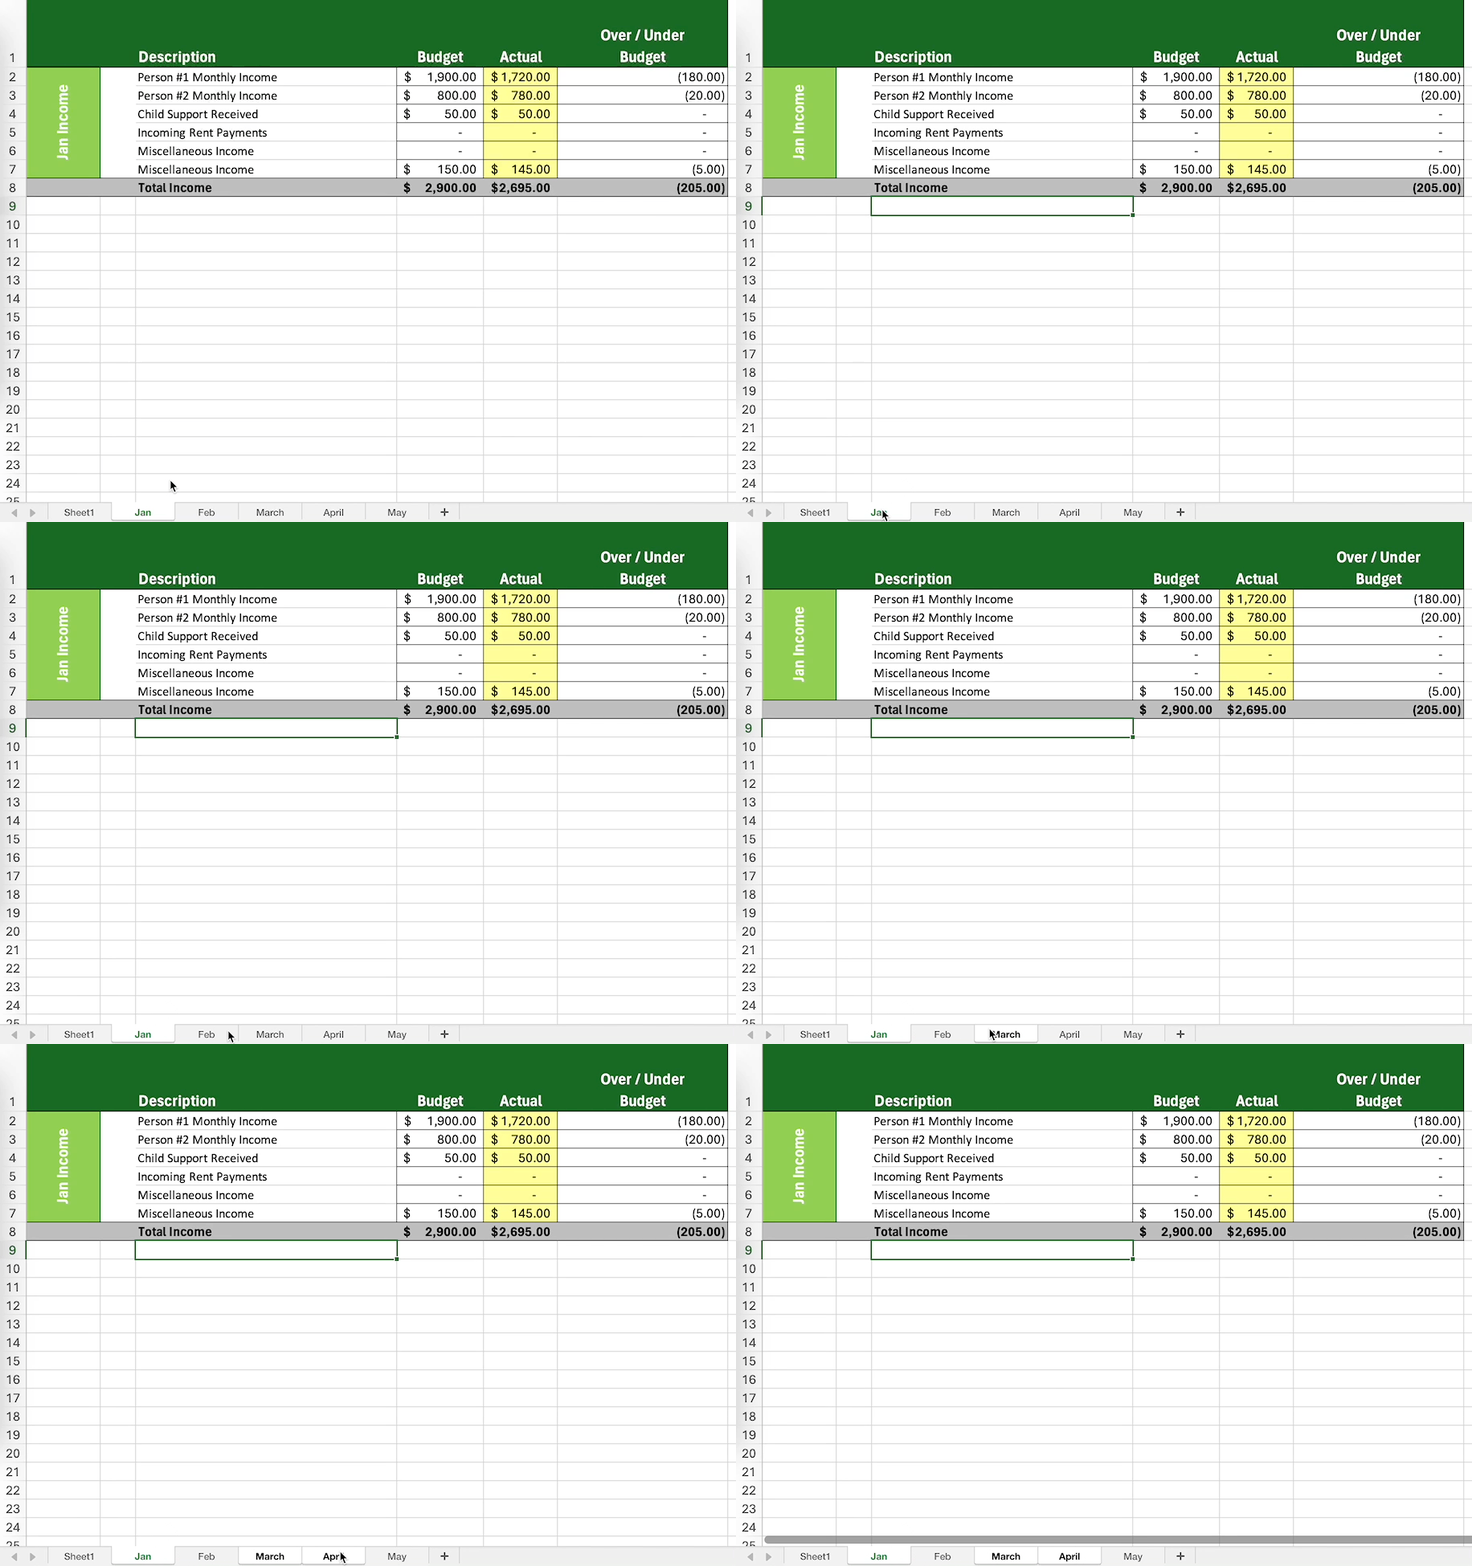
You can quickly group worksheets by using the keyboard shortcut. Press Ctrl (Command in Mac) and select the sheets you want to group using the mouse left-click.

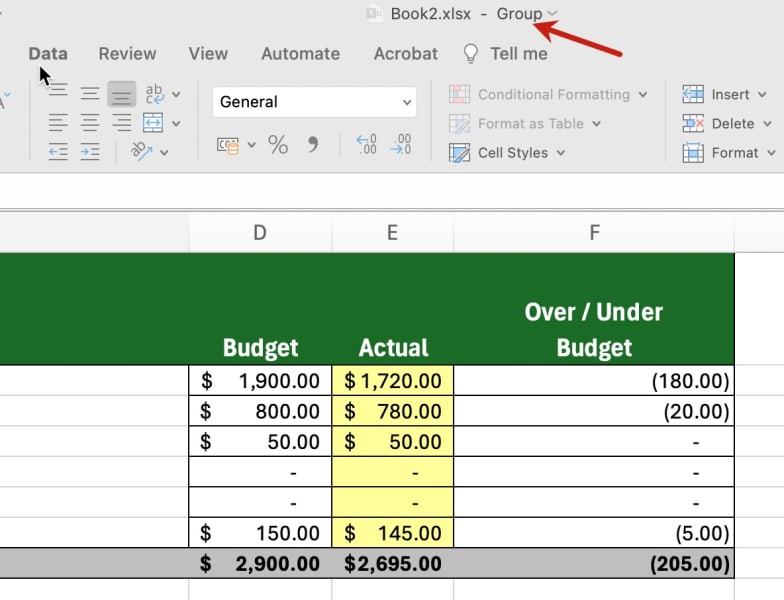
The sheets will be grouped automatically. You can see the group sheets tab colour turn to white. And the group suffix appears in the title bar.

You can edit all of these selected worksheets in one go. The formatting and data you enter will be consistent across the grouped worksheets. Please remember to ungroup the sheets after completing the task. This is to avoid editing sheets accidently forgetting that the sheets are grouped.
Finished!
Here’s How To Group All Worksheets in Excel
Step 1 - Right-Click On Any Worksheet Tab
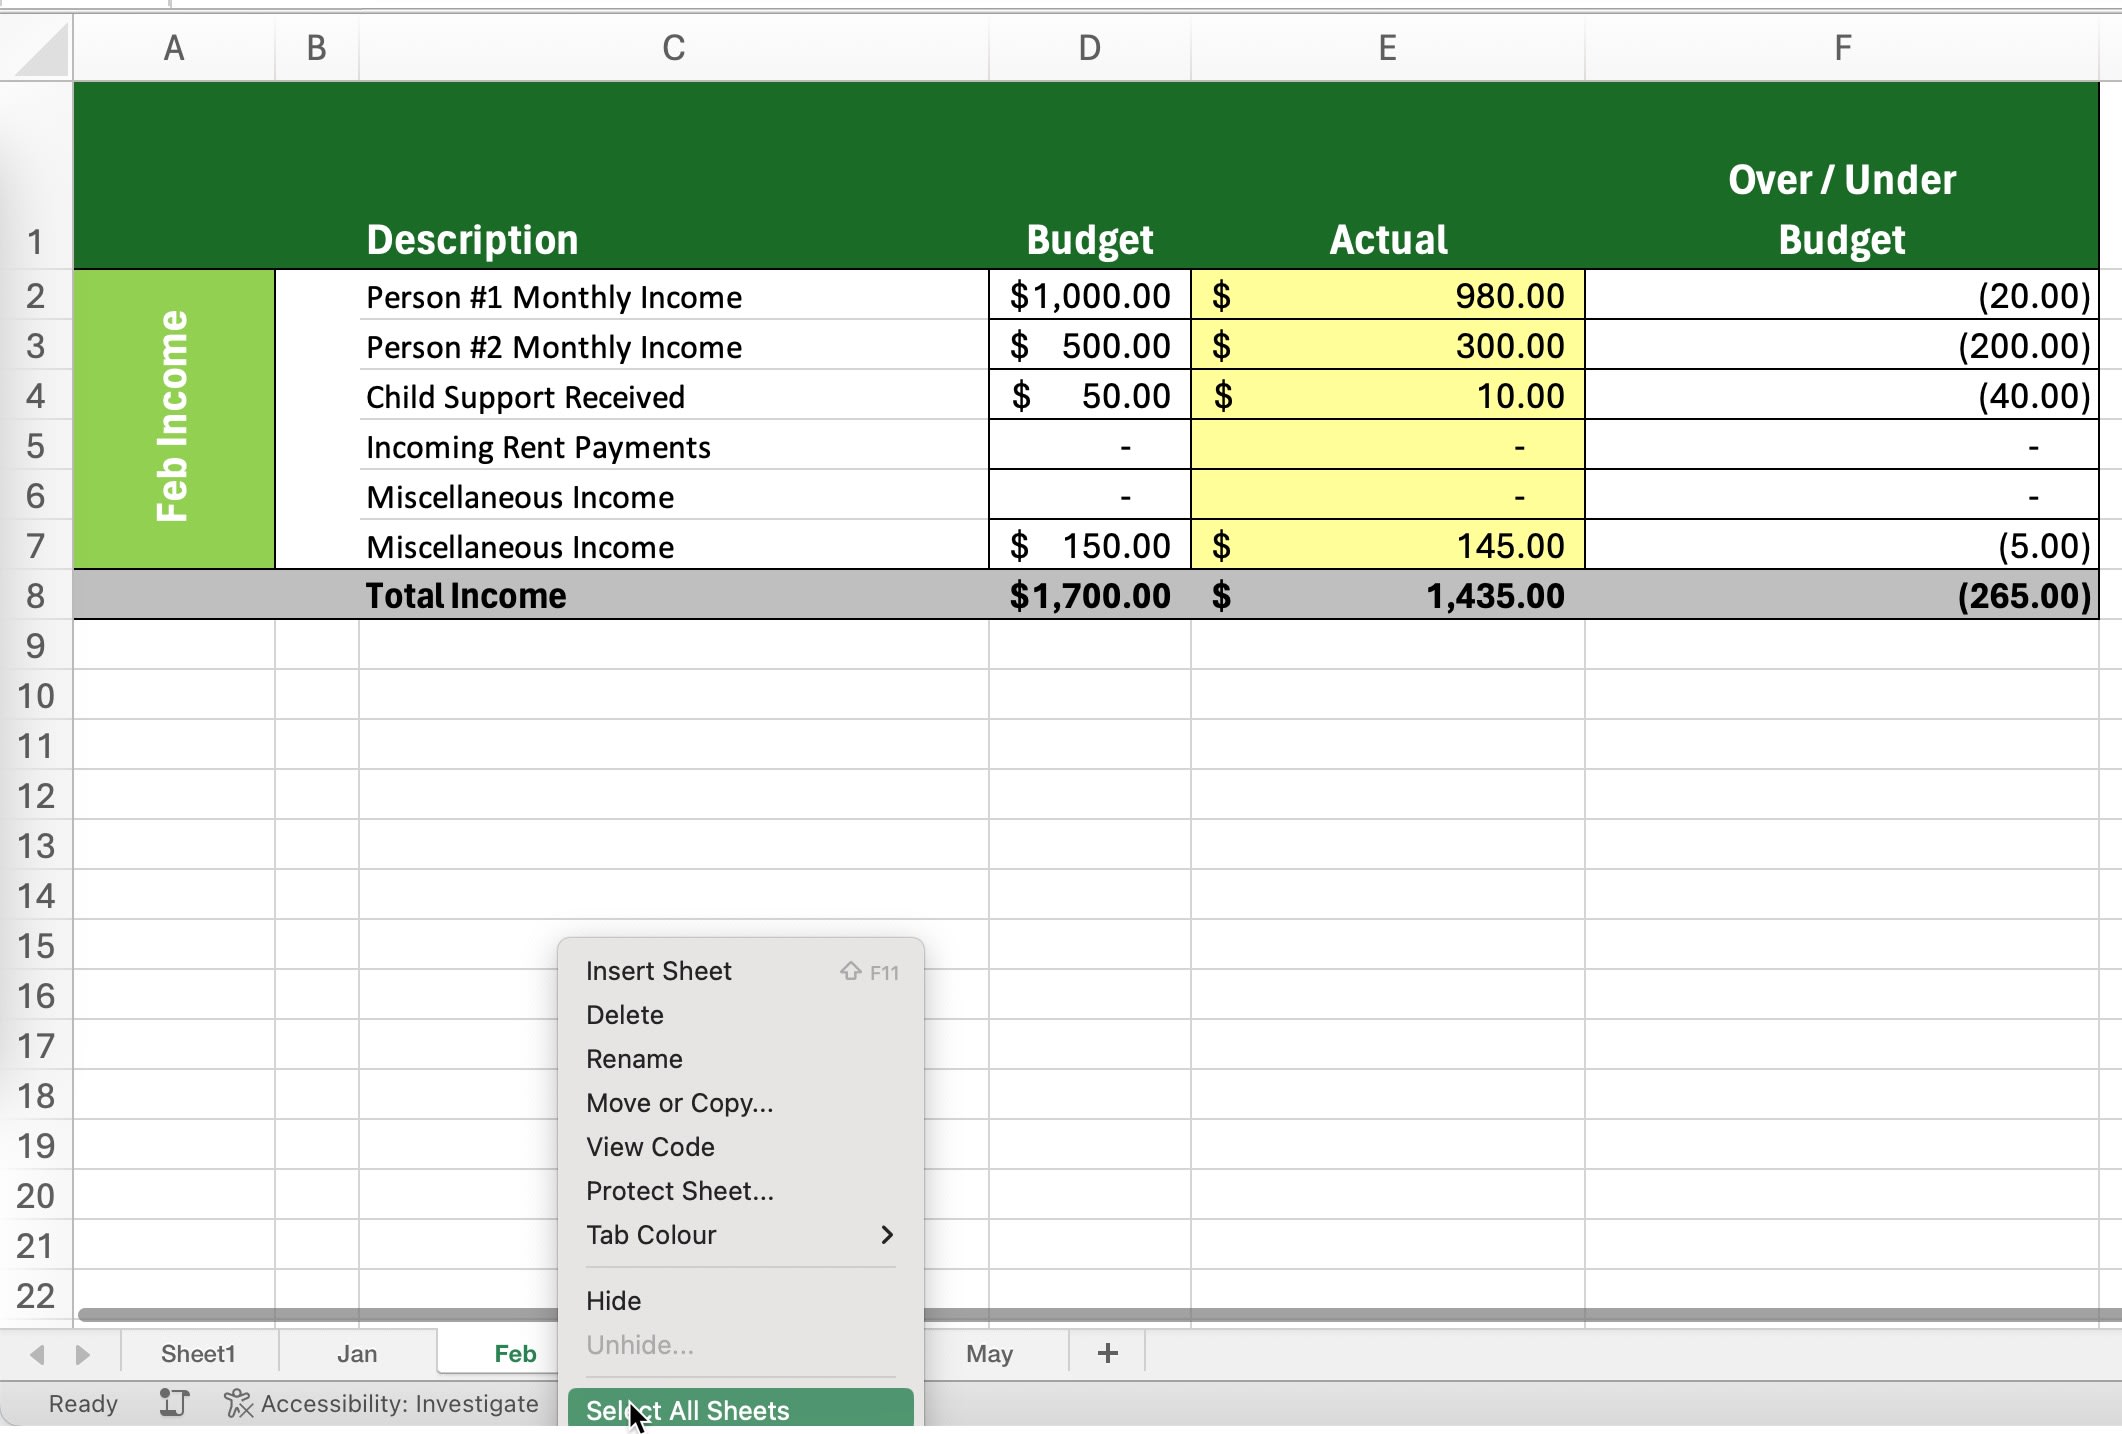
If you want to select all the worksheets, simply, right-click on any tab to open the context menu.

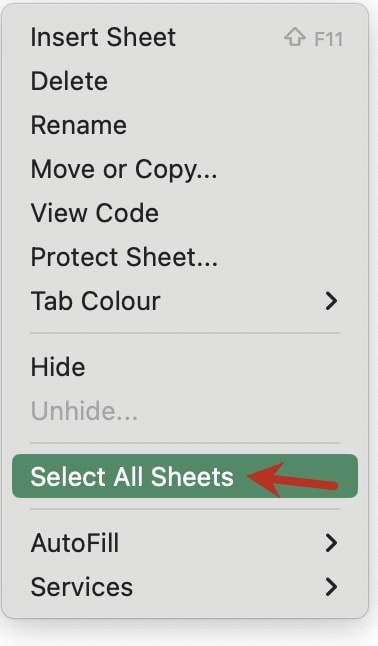
Step 2 - Click Select All Sheets
Click ‘Select All Sheets’ in the context menu.

The tab colour of all the sheets will turn white. And the ‘Group’ suffix will appear in the title bar.

There you go. You can now make edits, or create graphs/maps across all the worksheets.
Finished!