How to Make a Google Sheet View Only
Fast navigation
In 4 simple steps, this guide will show you how to make a Google Sheet view only.
Protecting your data from unauthorized or accidental changes ensures it remains intact and secure while being shared.
So let’s dive in and make your Google Sheet access view only!
Steps:
- Open Your Google Sheet
- Share the File with Specific People or Get a Shareable Link
- Set Access Permissions to View Only
- Verify View Only Access
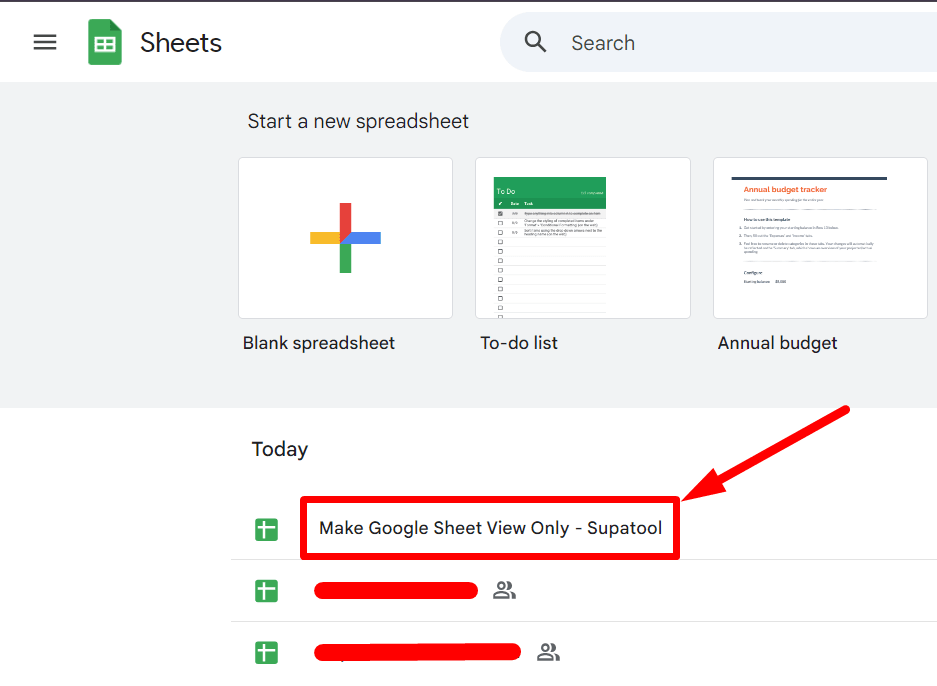
Step 1: Go to Your Google Sheet
Step 2: Share the File with Specific People or Get a Shareable Link
For Specific People:
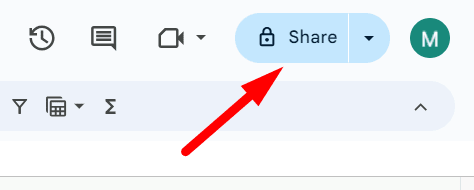
Click on the Share button in the upper right corner.
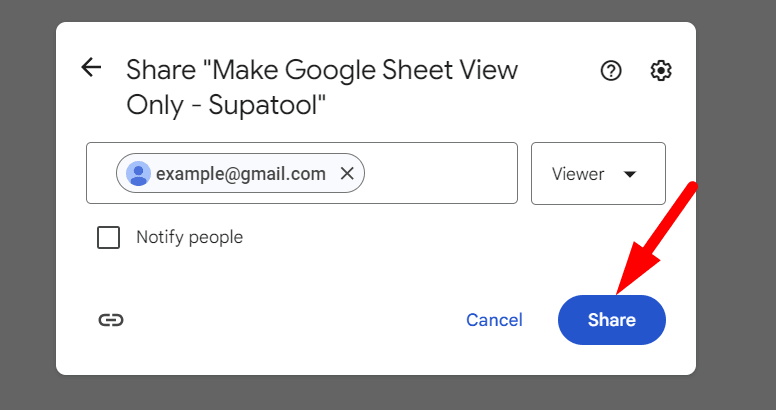
Enter the email addresses of the person you want to share the spreadsheet with.
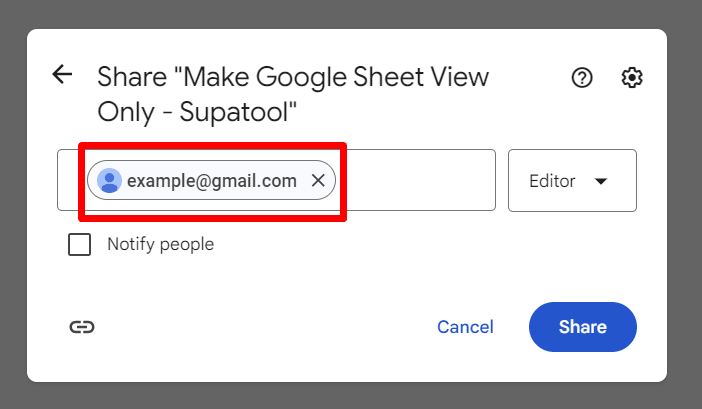
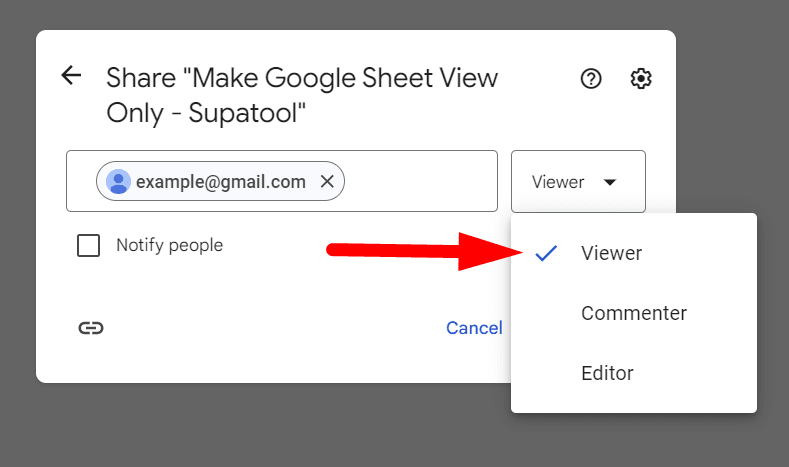
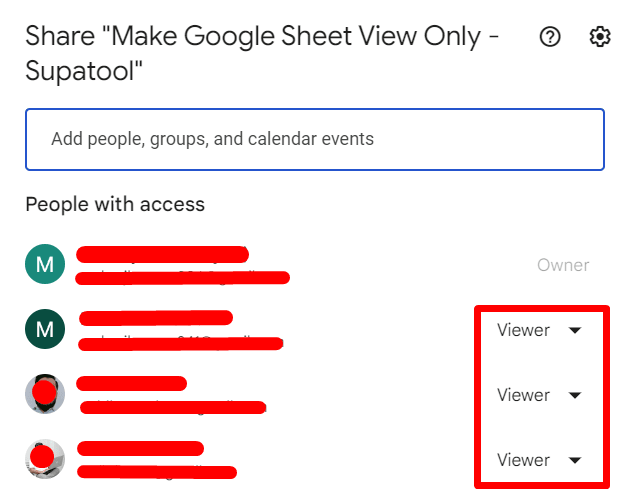
Click on the dropdown menu next to their name and select Viewer. This will give them view only access.
Click ‘Share’ to share the document.
For Anyone with the Link:
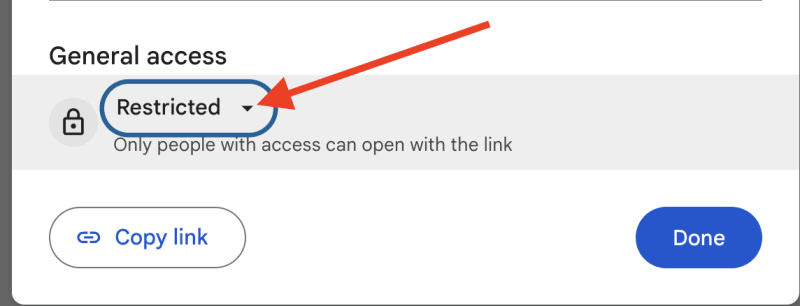
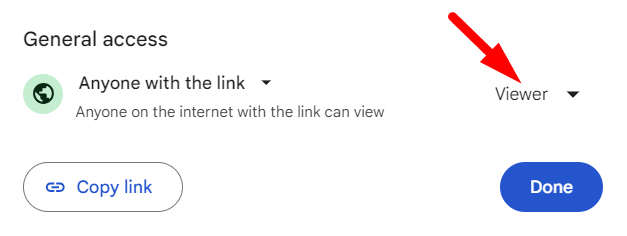
Click on the ‘Share’ button, then below “General access”, you'll see your sheet is in ‘Restricted’ access mode. Click on the dropdown arrow.
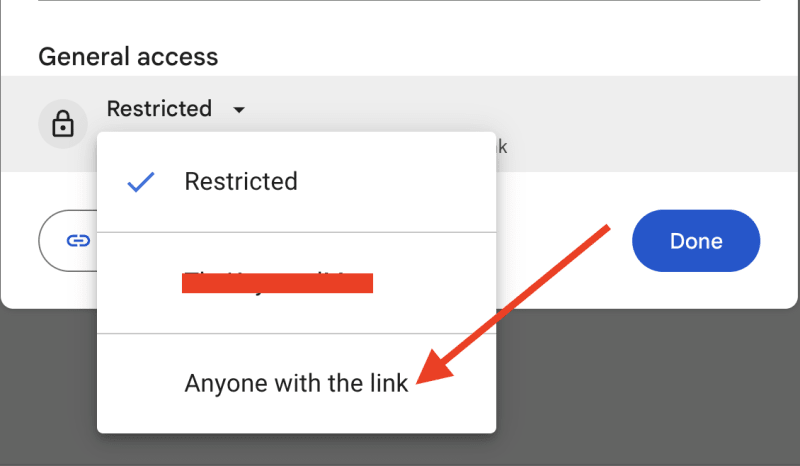
Then choose “Anyone with the link” from the dropdown menu.
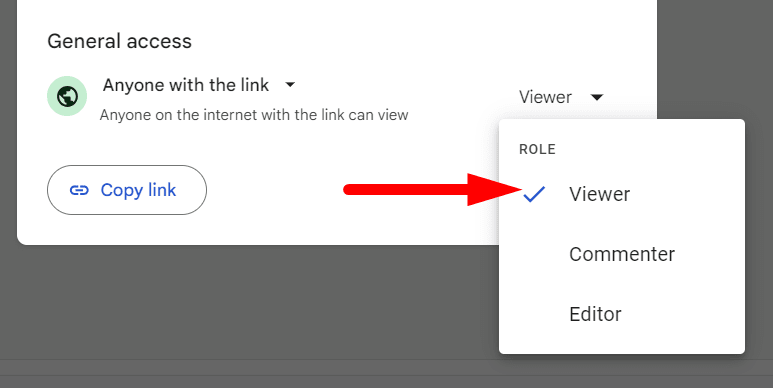
In the dropdown menu where it says Editor, change it to Viewer. This will make the document view only for anyone who has the link.
Step 3: Set Access Permissions to view only
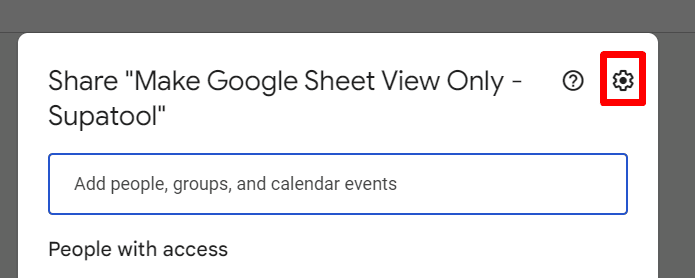
For more control over who can access your file and how, click on the gear icon at the upper right corner of the sharing settings.
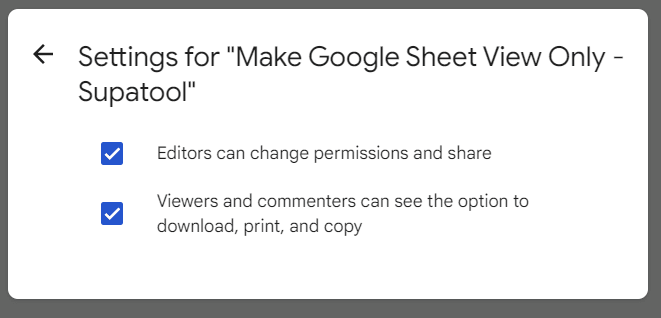
Here, you can decide whether editors can change permissions and share the file, as well as whether viewers and commenters can see the option to download, print, and copy the spreadsheet.
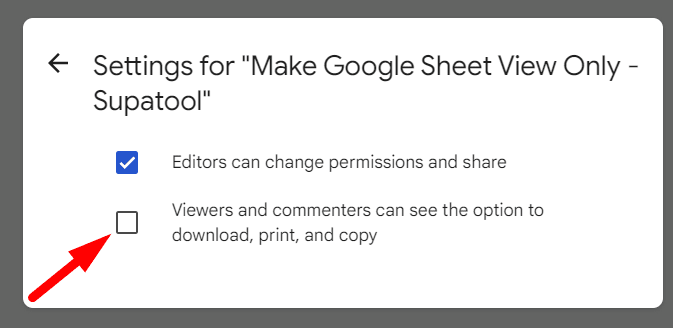
To prevent viewers from downloading, printing or copying the document, uncheck the box beside Viewers and commenters can see the option to download, print and copy.
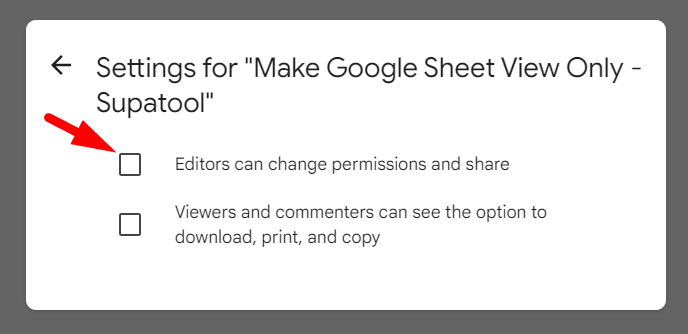
You can also choose to disable options for editors by unchecking the box next to Editors can change permissions and share.
Step 4: Verify view only Access
To ensure that the settings have been correctly applied, you can verify the access permissions:
Click on the Share button again to reopen the sharing settings.
Confirm that the users are listed as Viewers under the "People with access" section.
For public links, ensure the general access is set to Anyone with the link and that the dropdown is set to Viewer.
By following these steps, you can easily make your Google Sheets view only, ensuring that your data is protected from unwanted changes.
Whether you're sharing with specific people or providing access via a link, these settings help maintain the integrity of your information while still making it accessible to those who need to view it.
Finished!
